Deviled Eggs Recipe: Easy, Creamy, and Perfect Every Time
Let’s be real deviled eggs are the unsung heroes of any gathering. They’re simple, classic, and yet somehow fancy enough to make people think you’ve spent hours in the kitchen. But here’s the thing: most deviled eggs are either too bland or too weirdly mushy. Ever had one that just crumbles apart in your hand? Yeah, not fun. That’s why I’m here to share the ultimate deviled eggs recipe, straight from my kitchen to yours, with all the tips, tricks, and personal hacks I’ve collected over the years.
So grab your apron, a dozen eggs, and maybe a little patience. By the end of this, you’ll be whipping up creamy, tangy, perfectly seasoned deviled eggs that everyone will fight over (seriously, be prepared for jealousy).
Why Deviled Eggs Are a Classic You Can’t Ignore
Before we jump into the nitty-gritty, let’s talk about why deviled eggs are basically magical.
- Versatility: Classic, spicy, tangy, or downright gourmet deviled eggs can be customized in endless ways.
- Quick prep: If you know a few tricks, you can whip them up in under 30 minutes.
- Crowd-pleaser: Whether it’s a potluck, a family gathering, or just “I want something tasty for lunch,” deviled eggs deliver.
Honestly, they’re like the Swiss Army knife of appetizers. And IMO, there’s a certain satisfaction in slicing an egg in half, scooping out that yolk, and turning it into a creamy masterpiece.
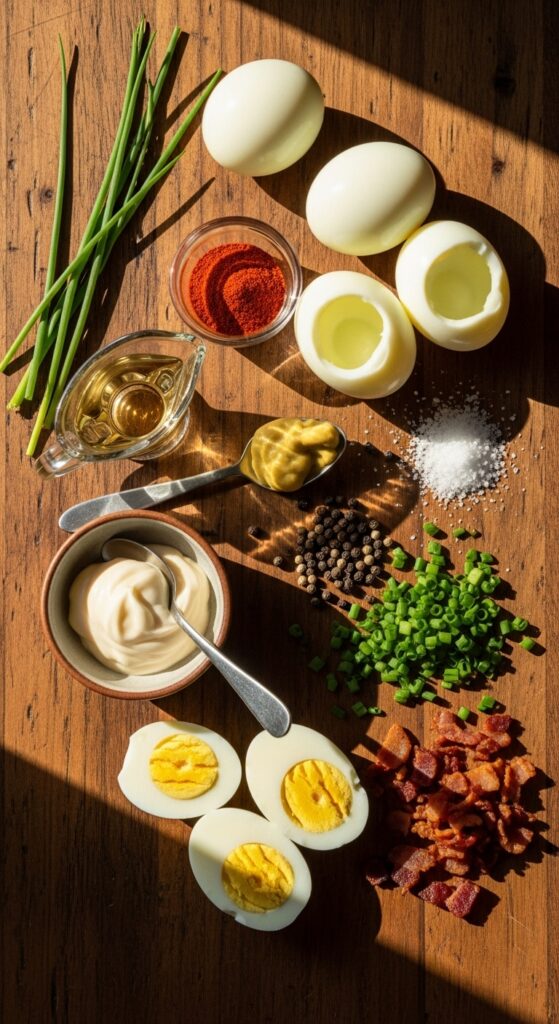
Ingredients: The Stars of the Show
Here’s where the magic begins. Quality ingredients make all the difference. Don’t skimp this is one time where fresh really matters.
What you’ll need:
- 6 large eggs (or more if you’re feeding a crowd)
- 3 tbsp mayonnaise (homemade or good quality store-bought don’t even think about the low-fat stuff)
- 1 tsp Dijon mustard (classic flavor, subtle tang)
- 1 tsp white vinegar or apple cider vinegar (trust me, it wakes up the yolks)
- Salt and freshly cracked black pepper, to taste
- Paprika for garnish (smoky or sweet, your call)
Optional extras:
- Chopped chives or green onions
- Crispy bacon bits
- Pickle relish
- Hot sauce for a kick
FYI, adding extras can turn a standard deviled egg into a flavor bomb, but I’ll walk you through that later.

Step 1: Boiling the Perfect Egg
Ah, the dreaded egg boiling stage. One misstep here, and you get gray rings around your yolk or, worse, eggs that explode in the pot. No one wants that, trust me.
Here’s my foolproof method:
- Place eggs in a single layer in a pot. Cover with cold water by about an inch.
- Add a pinch of salt (this helps with peeling later game changer!).
- Bring water to a boil over medium-high heat. Don’t walk away; keep an eye on it.
- As soon as it boils, cover the pot and remove it from heat. Let the eggs sit for 10-12 minutes depending on how firm you like the yolk.
Pro tip: Immediately transfer eggs to an ice bath after cooking. This stops the cooking process and makes peeling infinitely easier.
Ever tried peeling eggs that aren’t cooled? Yeah… nightmare fuel.
Step 2: Peeling Without Losing Your Mind
Peeling eggs is the true test of patience. But I’ve got hacks:
- Tap and roll: Gently tap the egg on a hard surface, then roll it to crack the shell all over.
- Start at the wide end: There’s usually an air pocket here—perfect for sliding your fingers under the shell.
- Under running water: Peeling under cold running water helps wash away stubborn bits of shell.
If you’ve done this right, your eggs should be smooth and whole. If not, don’t worry you can always trim uneven edges.
Step 3: Scooping Out the Yolks
This is the fun part the transformation begins.
- Slice eggs lengthwise (hot tip: a serrated knife works better than a plain one).
- Carefully scoop out the yolks into a medium mixing bowl.
- Set the whites aside on a plate, cut side up, ready for filling.
Here’s where you start to see the potential of a simple egg turning into a creamy, tangy delight.
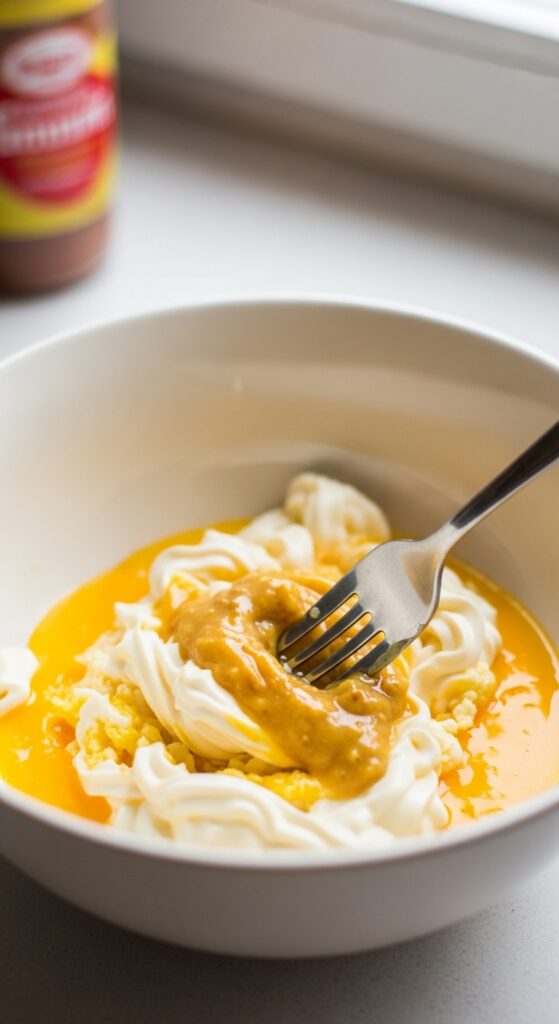
Step 4: Making the Filling
Now, this is where deviled eggs either become meh or legendary.
Basic filling formula:
- Mash the yolks with a fork until smooth
- Add mayonnaise, mustard, vinegar, salt, and pepper
- Mix thoroughly until creamy
Optional extras for personality:
- Chives: Fresh and mild onion flavor
- Bacon bits: Because everything’s better with bacon
- Hot sauce: For those who like living dangerously 😉
Pro tip: Taste the filling before piping. Yes, you can totally eat it with a spoon. No judgment.
Step 5: Piping or Spoon-Filling the Eggs
Time to get fancy or not. You’ve got options:
- Spoon method: Quick, casual, slightly rustic
- Piping method: Professional, neat, perfect for parties
I personally love piping. It makes the eggs look Instagram-worthy. Use a zip-top bag with the corner cut if you don’t have a piping bag. Works like a charm.

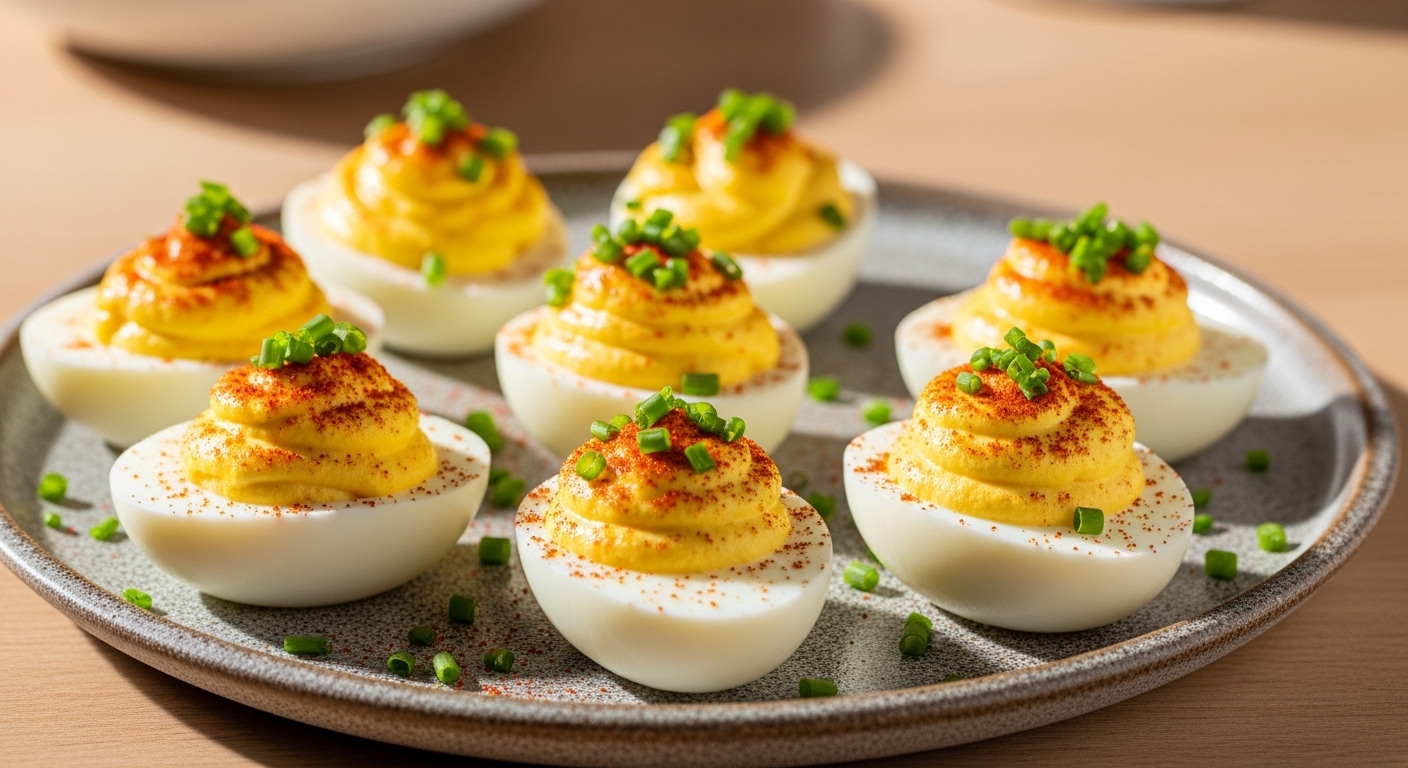
Step 6: Garnish Like a Pro
Don’t skip this part. A little garnish goes a long way:
- Paprika: Classic, adds color and mild flavor
- Chives or green onions: Fresh green pop
- Bacon bits or pickled jalapeños: Optional, but make them wow
And just like that, your eggs go from zero to “OMG, who made these?” in seconds.
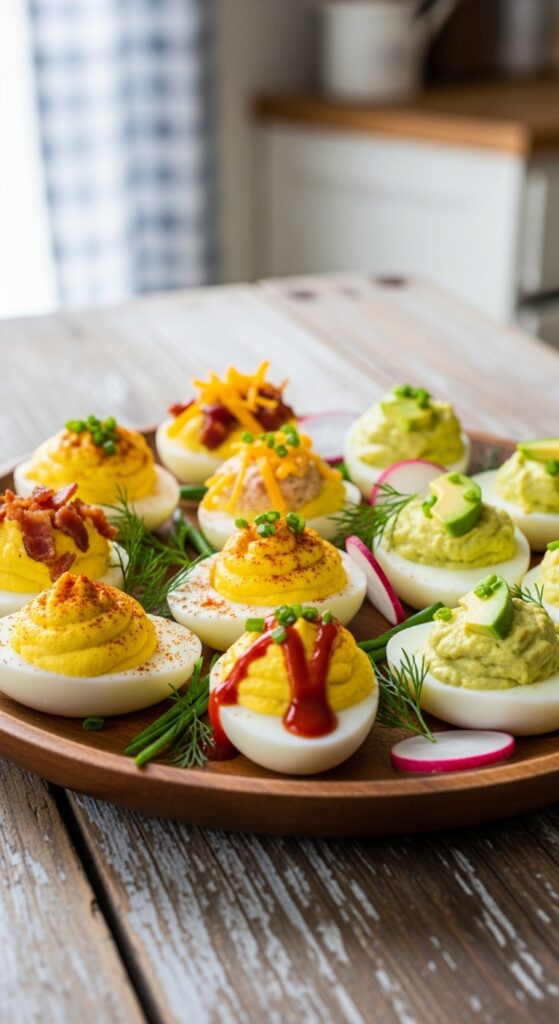
Variations to Keep It Interesting
Deviled eggs don’t have to be basic. Here are a few variations I swear by:
- Classic Southern: Mayo + mustard + pickle relish + paprika
- Spicy Sriracha: Add a teaspoon of sriracha to the yolk mixture
- Bacon & Cheddar: Fold in crispy bacon bits and shredded cheddar
- Avocado Deviled Eggs: Replace half the mayo with mashed avocado
- Herby Delight: Add dill, parsley, or tarragon for freshness
Ever wondered why these variations are so addicting? It’s because small tweaks create big flavor jumps. Plus, people love novelty especially when it’s still creamy and familiar.
Common Mistakes and How to Avoid Them
Even pros mess up sometimes. Here’s what I’ve learned the hard way:
- Overcooking the eggs: Leads to a gray-green ring and rubbery texture. Stick to 10-12 minutes in an ice bath.
- Too much mayo: Fills are soggy, not creamy. Less is more, always.
- Skipping the taste test: You’ll regret it at the party. Taste before you pipe!
- Messy piping: Chill the filling for 10 minutes before piping it holds shape better.
Storage and Make-Ahead Tips
Deviled eggs can be a bit tricky to store, but I’ve got your back.
- Refrigeration: Store in an airtight container, eggs separated from garnish if possible. Lasts up to 2 days.
- Make-ahead: You can boil, peel, and even make the filling a day in advance. Assemble just before serving for best presentation.
- Freezing: Not recommended. The texture changes, and nobody wants soggy eggs.
FYI, prepping in stages saves time and stress trust me, I’ve hosted too many parties to do otherwise.
Serving Suggestions
Deviled eggs are surprisingly versatile when it comes to presentation:
- Classic tray: Neat rows, sprinkled with paprika
- Fancy platter: Use lettuce or kale as a base, add herbs for visual appeal
- Finger-food style: Perfect for picnics, potlucks, or casual snacks
Serve them with drinks, alongside a salad, or just grab one when no one’s looking no judgment, I’ve been there.
Fun Facts About Deviled Eggs
Because a little trivia makes food even better:
- They date back to the ancient Romans, who stuffed boiled eggs with spicy sauces. Yes, humans have been obsessed for centuries.
- The term “deviled” comes from the 18th century, meaning “spicy or zesty.”
- They were a hit at American Victorian dinners, proving their long-standing party cred.
So next time someone calls them “just eggs,” you can hit them with historical receipts 😎.
Why You Should Make Deviled Eggs Now
Honestly, if you haven’t made deviled eggs recently or ever you’re missing out. They’re:
- Quick and easy, yet feel fancy
- Customizable, so you can cater to every taste
- Guaranteed crowd-pleasers, no RSVP stress
And the best part? They give you a sense of accomplishment without requiring a full gourmet skill set.
My Personal Deviled Egg Hack
Here’s a little secret I’ve discovered: mixing a tiny bit of cream cheese into the yolk mixture makes the filling extra creamy and luxurious. Just a tablespoon, and it’s like your taste buds are at a 5-star brunch.
Also, sprinkling smoked paprika instead of regular adds a subtle, savory depth that people always comment on. IMO, it’s worth the extra two seconds.
Final Thoughts
So there you have it: a complete, foolproof guide to deviled eggs recipe perfection. From boiling eggs without crying over peeling mishaps, to creating a filling that’s creamy, tangy, and customizable, you’re now armed with everything you need to impress friends, family, and maybe even yourself.
Remember:
- Use fresh eggs and ice bath them
- Don’t overdo the mayo
- Taste test, always
- Get creative with garnishes and variations
Next time someone asks, “Who made these amazing deviled eggs?” you can smile knowingly and say, “I did. And yes, they’re as good as they look.”
Now go on, give it a try. Your kitchen, your rules, and maybe a few jealous friends staring at your platter 😏.