Easy Homemade Turkey Sliders Recipe for Perfect Game Day
If you’re like me, the word “slider” instantly sparks joy. Tiny, manageable, and packed with flavor, sliders are basically a handheld hug for your taste buds. And let’s be honest when it comes to turkey sliders, we’re talking about a perfect way to elevate leftover turkey or just enjoy a lighter, juicier sandwich alternative. Honestly, these little guys are perfect for game day, parties, or a cozy weeknight dinner.
Ever wondered why mini sandwiches are so irresistible? It’s the perfect ratio of bread to filling. Bite after bite, you’re rewarded with moist turkey, melty cheese, and a tangy spread that’s just…chef’s kiss. And FYI, making them at home is way easier than it sounds. I’ve got all the tips, tricks, and flavor hacks lined up for you.
Why Turkey Sliders Are the Ultimate Comfort Food
When it comes to comfort food, sliders hit the sweet spot. They’re:
- Miniature but mighty: Small size, big flavor.
- Customizable: Add cheese, pickles, or even a slice of cranberry sauce.
- Perfect for leftover turkey: No waste, all taste.
I’ll admit I’ve made a lot of sandwiches in my life, but something about turkey sliders just screams “home-cooked magic.” Ever wondered why the bread tastes even better in sliders? Smaller buns heat faster, toast evenly, and soak up sauces just enough without becoming soggy.
Ingredients You’ll Need
Let’s get real part of what makes sliders irresistible is fresh, flavorful ingredients. Here’s my go-to list:
Slider Basics
- 1 lb cooked turkey, shredded or thinly sliced
- 12 slider buns, preferably soft and slightly sweet
- 4 oz cream cheese, softened
- 1/4 cup mayonnaise
- 2 tbsp Dijon mustard
Flavor Boosters
- 1/2 cup shredded cheddar or Swiss cheese
- 2 tbsp chopped fresh parsley
- 1/4 tsp smoked paprika
- Salt and pepper, to taste
Optional Extras
- Pickles, caramelized onions, or thin apple slices for crunch
- A smear of cranberry sauce for a sweet-tangy kick
- Spicy mayo or chipotle sauce for heat
FYI, the beauty of sliders is that you can mix and match flavors without messing up the base. I once threw in leftover roasted red peppers and my friends went nuts. True story.
Step-by-Step Turkey Sliders Recipe
Step 1 – Prep the Buns
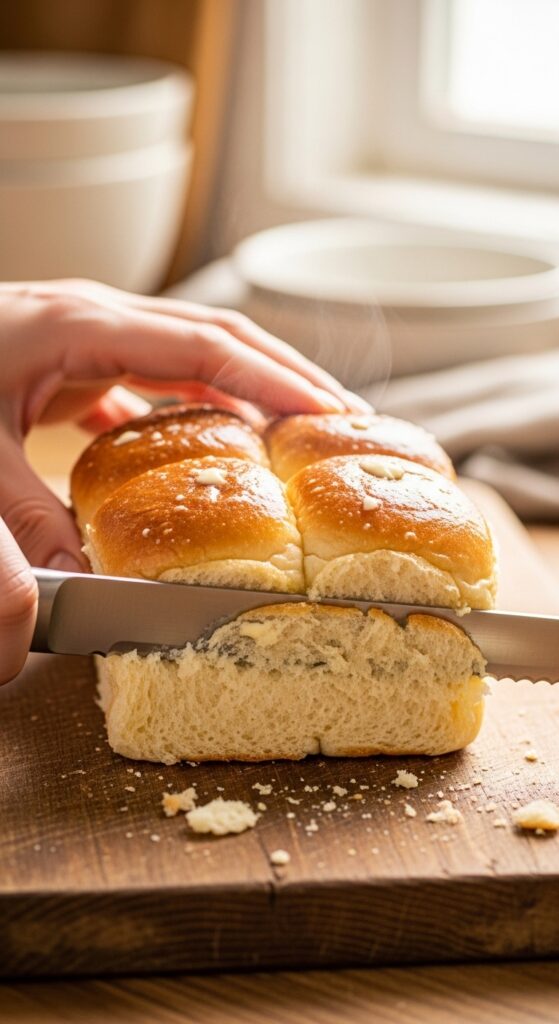
Preheat your oven to 350°F (175°C). Slice your slider buns in half and lay them cut-side up on a baking sheet. For extra flavor, brush the tops with melted butter and sprinkle a pinch of garlic powder. Bake for 5–7 minutes until they’re lightly golden. Trust me, this step makes a world of difference crispy, buttery edges are a game changer.
Step 2 – Mix the Sauce
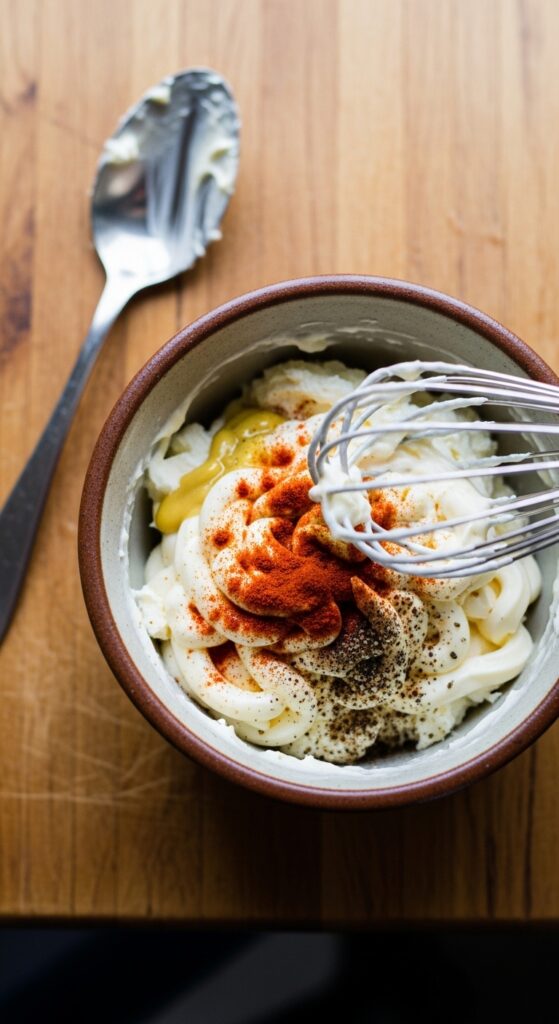
In a small bowl, combine:
- 4 oz cream cheese
- 1/4 cup mayonnaise
- 2 tbsp Dijon mustard
- Smoked paprika, salt, and pepper
Whisk until smooth and creamy. This tangy, rich sauce is going to elevate your turkey to next-level deliciousness. Ever wondered why sliders taste better than regular sandwiches? The sauce. Don’t skip it.
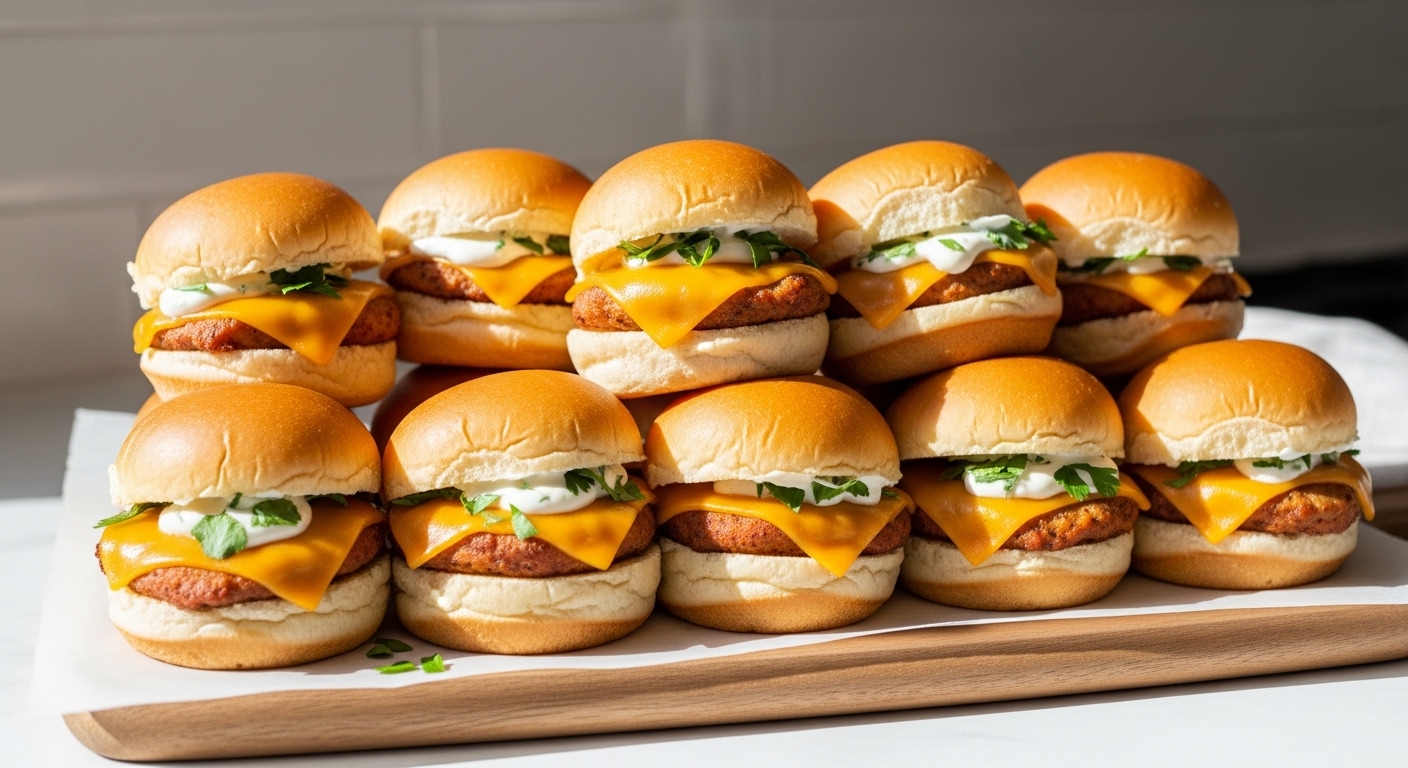
Step 3 – Assemble the Sliders
- Spread a generous layer of sauce on the bottom half of each bun.
- Layer turkey evenly. I like 2–3 oz per slider, enough to get a bite of turkey in every nibble.
- Sprinkle shredded cheese on top.
- Optional: Add pickles, apple slices, or caramelized onions.
Pro tip: don’t overload the buns, or you’ll have a messy slider disaster. Bite-sized perfection is the goal.
Step 4 – Bake for Melty Magic

Once assembled, place sliders on a baking sheet and cover loosely with foil. Bake for 8–10 minutes, until the cheese melts and the sliders are heated through. Then, remove the foil and broil for 1–2 minutes to lightly toast the tops. Instant golden-brown happiness.
Tips for Perfect Turkey Sliders
Even if you follow the recipe, a few insider tricks make your sliders shine:
- Use day-old buns: Slightly stale buns hold up better and soak up sauces without turning mushy.
- Shred the turkey: Shredded turkey distributes flavor evenly and ensures every bite is juicy.
- Customize the cheese: Swiss, cheddar, provolone pick your favorite. Mixing two cheeses = chef’s magic.
- Add a sweet element: Cranberry sauce or apple slices cut through richness and add brightness.
IMO, sliders are all about balance savory turkey, melty cheese, tangy sauce, soft yet crisp bun. Missing one element? Your sliders are still tasty, but perfection is in the details.
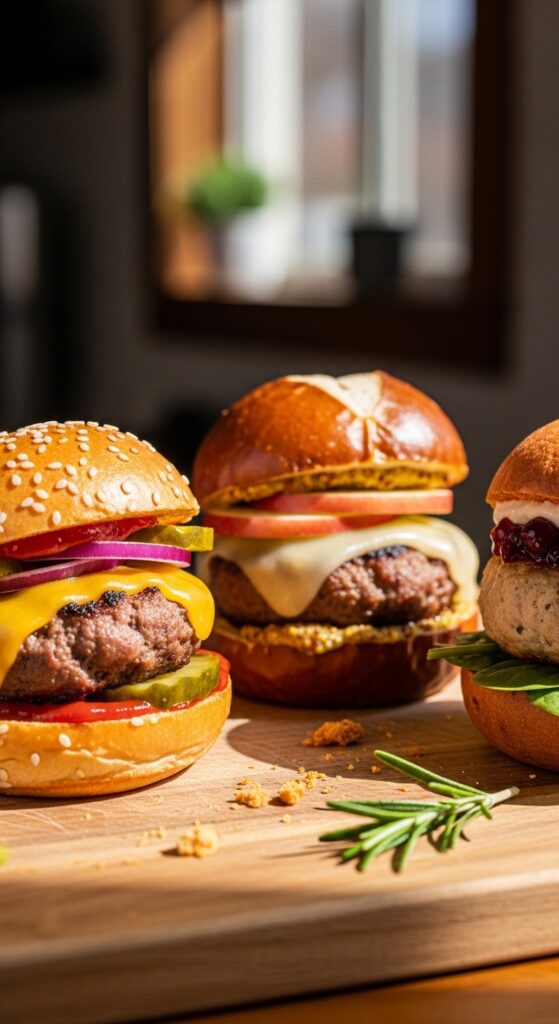
Creative Turkey Slider Variations
Why settle for the classic when you can experiment? Here are a few favorites I swear by:
Classic Cheddar Turkey Slider
Just turkey, cheddar, and the creamy sauce. Simple, reliable, crowd-pleasing.
Cranberry Turkey Slider
Add a spoonful of cranberry sauce under the turkey for a sweet-tangy contrast. Instant holiday vibes.
Spicy Chipotle Turkey Slider
Mix chipotle in adobo with mayo for a smoky, spicy kick. Warning: addictive.
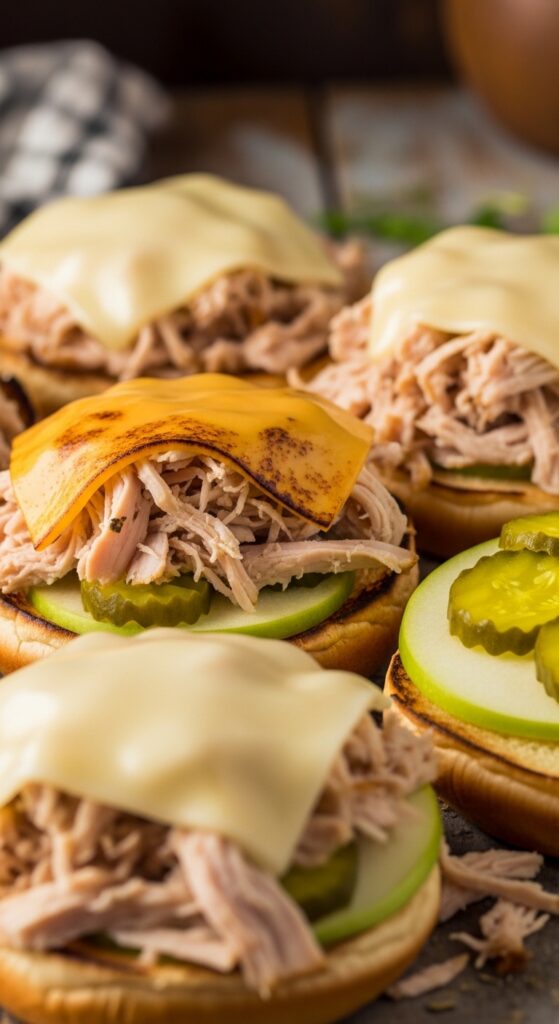
Apple & Swiss Slider
Thin apple slices + Swiss cheese = sweet, nutty, and melty perfection. Great for brunch or a fun twist.
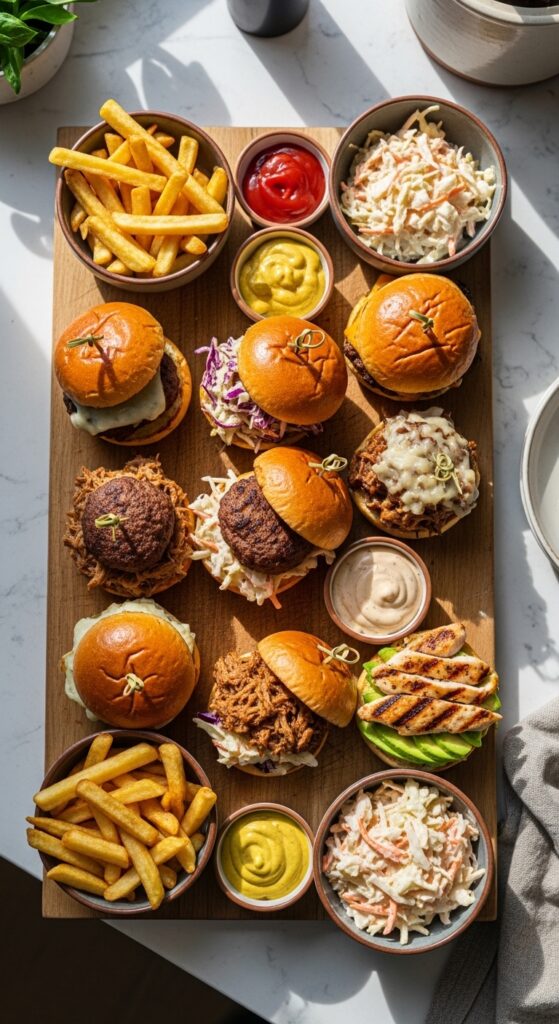
Serving Suggestions
Sliders are versatile and party-ready. Here’s how I like to serve them:
- On a wooden serving board for casual gatherings
- With crispy fries or sweet potato wedges
- Paired with coleslaw or a light salad
- Wrapped individually in parchment for picnics or lunchboxes
Ever noticed how mini sandwiches instantly make a meal feel fun? That’s why turkey sliders are a hit at any event, from game nights to family dinners.
Storing and Reheating
If you have leftovers (rare, but it happens):
- Refrigerate: Sliders stay fresh for 2–3 days in an airtight container.
- Reheat: Wrap in foil and bake at 325°F for 5–7 minutes. Avoid microwaving if you want to keep the bun texture intact.
- Freeze: Assemble without baking, wrap individually, and freeze for up to 2 months. Bake straight from frozen at 350°F for 12–15 minutes.
FYI, reheated sliders still taste amazing almost like they were just made.
Why These Sliders Are Better Than Takeout
Let’s be real takeout sandwiches are fine, but homemade turkey sliders beat them for several reasons:
- Control over ingredients – no mystery sauces, preservatives, or overly salty fillings.
- Customizable flavors – spice, sweet, tangy—you’re the boss.
- Freshness factor – warm, just-baked buns and melted cheese.
- Fun factor – assembling sliders is almost therapeutic, and kids/adults love it.
Honestly, after you make these once, takeout will feel…meh. Sliders = instant homemade comfort with zero guilt.
Frequently Asked Questions
Can I Use Leftover Turkey?
Absolutely! Sliders are perfect for using up roasted turkey, especially after the holidays. Shred it for easy layering.
What’s the Best Cheese for Turkey Sliders?
Cheddar, Swiss, provolone, or a combo. Choose melty cheese for that ooey-gooey slider effect.
Can I Make These Ahead of Time?
Yes. Assemble them, cover with foil, and refrigerate. Bake when ready to serve. This works especially well for parties.
How Do I Keep the Buns Soft?
Lightly brush tops with butter before baking and avoid over-toasting. The buns should be soft inside with a gentle crust outside.
Final Thoughts
Honestly, making turkey sliders is one of those simple pleasures that makes cooking fun. Bite-sized, flavorful, and versatile, they’re perfect for parties, weeknight dinners, or meal-prep lunches. Whether you stick to the classic, throw in cranberry sauce, or spice things up with chipotle, these sliders are comfort food done right.
So here’s my challenge for you: grab some turkey, slider buns, and your favorite toppings. Whip up a batch, gather your friends or family, and enjoy the magic. You’ll see it’s addictive. And the best part? Everyone gets a little piece of joy in every bite.
Now, go make sliders. Trust me, your taste buds will thank you.