Crispy Loaded Roasted Cauliflower with Cheese & Bacon
Let’s be honest: cauliflower often gets a bad rap. People treat it like the sad sidekick of vegetables, sitting lonely next to your mashed potatoes or tossed in a bland soup. But loaded roasted cauliflower? Now that’s a game-changer. Seriously, one bite of golden, caramelized florets loaded with cheese, crispy toppings, and a drizzle of sauce can make even the staunchest cauliflower skeptic say, “Wait… this is amazing!”
I first tried this loaded roasted cauliflower recipe on a lazy Friday night, expecting a decent side dish. By the time dinner was done, my family had practically fought over the last floret. Ever had a veggie steal the show at the table? Yeah, this is it.
Why You’ll Love This Loaded Roasted Cauliflower Recipe
This isn’t your average roasted cauliflower. It’s golden, crispy on the edges, tender in the middle, and topped with all the good stuff that makes comfort food irresistible.
What Makes It Special
- Flavor-packed: Cheese, herbs, spices, and a touch of garlic make it impossible to ignore.
- Textural contrast: Crunchy edges meet soft, tender centers, and the toppings add a satisfying bite.
- Versatile: Serve as a side, a snack, or even a vegetarian main.
Ever wondered why roasted cauliflower works better than boiled? Roasting concentrates its natural sweetness and gives a nutty, caramelized flavor that boiling just can’t touch.
Ingredients You’ll Need
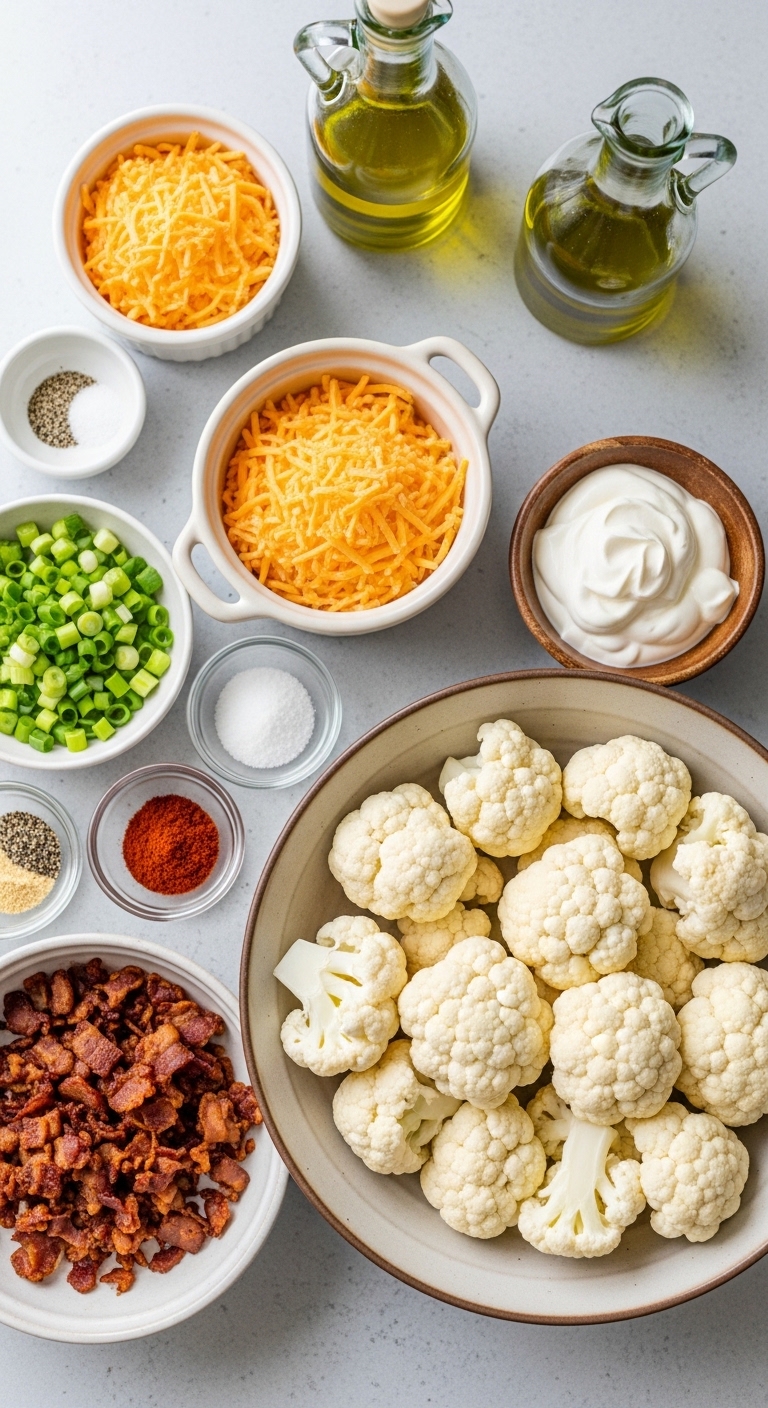
Don’t worry, this isn’t a list of 50 exotic things from aisle 12. You likely have most of these in your pantry.
For the Cauliflower:
- 1 large head of cauliflower, cut into florets
- 2 tablespoons olive oil
- Salt and black pepper to taste
- 1 teaspoon garlic powder
- 1 teaspoon smoked paprika (optional but amazing)
For the “Loaded” Toppings:
- ½ cup shredded cheddar cheese
- ¼ cup crumbled bacon or turkey bacon
- 2 tablespoons chopped green onions
- 2 tablespoons sour cream or Greek yogurt
- Optional: hot sauce, chopped fresh parsley, or shredded mozzarella
FYI: You can customize these toppings endlessly. Want extra cheese? Go for it. Like spice? Add chili flakes. It’s your loaded masterpiece.
Choosing the Right Cauliflower
Not all cauliflower is created equal.
What to Look For
- Firm, compact head: Avoid heads with brown spots or soft sections.
- Tight florets: These roast more evenly.
- Fresh color: White or creamy tones are best; green-tinted florets may be older.
I’ve tried this recipe with cauliflower that looked “okay” but the texture was mushy. Lesson learned: pick a good head, or the whole dish suffers.
Prepping the Cauliflower
Good prep equals amazing results.
Step 1: Wash and Cut
Rinse thoroughly, remove the leaves, and cut into uniform florets. Even sizing ensures consistent roasting. Uneven pieces? You’ll end up with some burnt, some mushy.
Step 2: Dry the Florets
Moisture is the enemy of crispiness. Pat them dry with a clean kitchen towel. Seriously, don’t skip this.
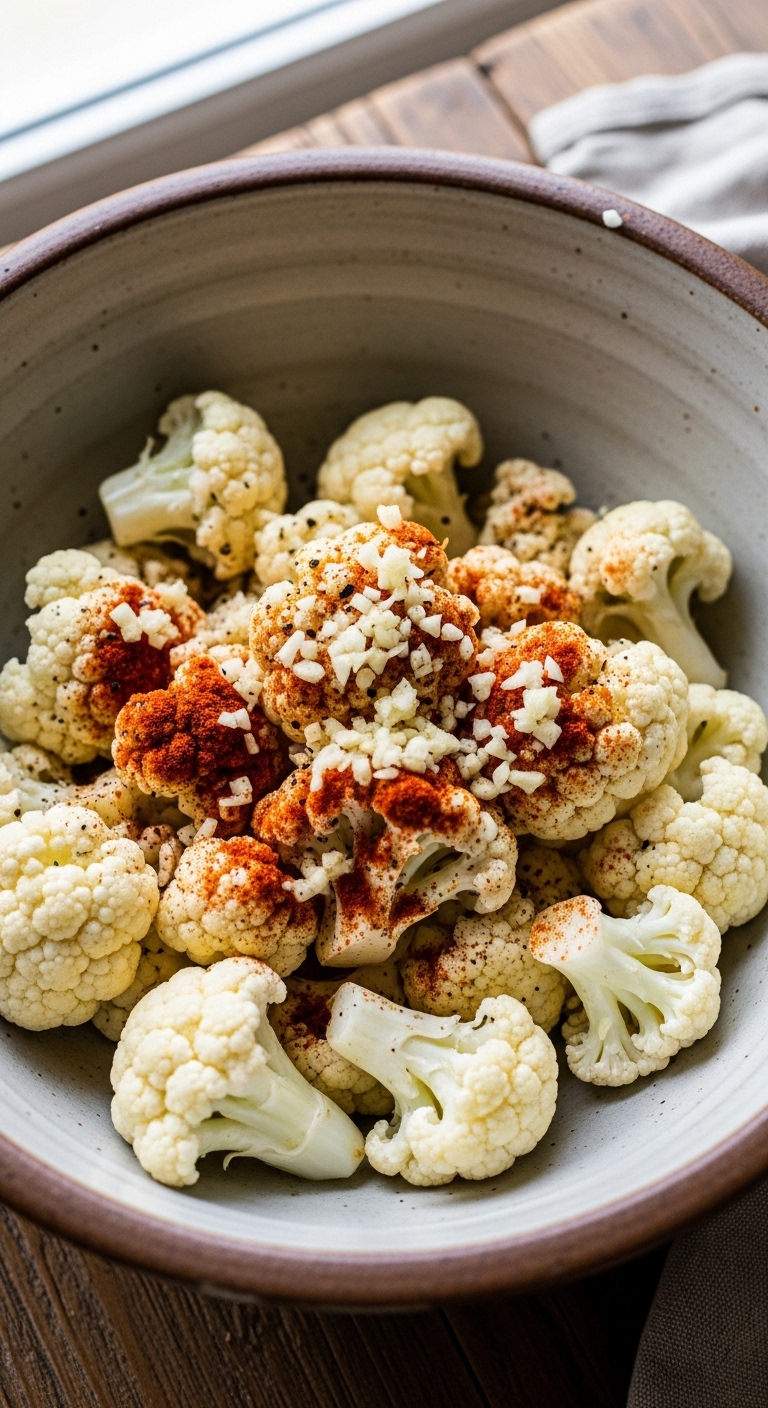
Step 3: Season Well
Toss the florets in olive oil, salt, pepper, garlic powder, and smoked paprika. Make sure every floret is coated. The oil helps with caramelization, while the seasonings boost flavor.
Roasting the Cauliflower

Here’s where the magic happens.
Oven Roasting
- Preheat your oven to 425°F (220°C).
- Spread the florets on a baking sheet in a single layer. Crowding is a rookie mistake; give them space.
- Roast for 20-25 minutes, flipping halfway through. Look for golden edges and tender centers.
Tips for Perfect Roasting
- Use parchment paper or a silicone mat for easy cleanup.
- Don’t stir too often; let the edges crisp.
- Optional trick: A quick broil for 2 minutes at the end intensifies browning.
Ever roasted cauliflower and it came out soggy? That usually happens when the pan is overcrowded or the oven temp is too low.
Making It “Loaded”
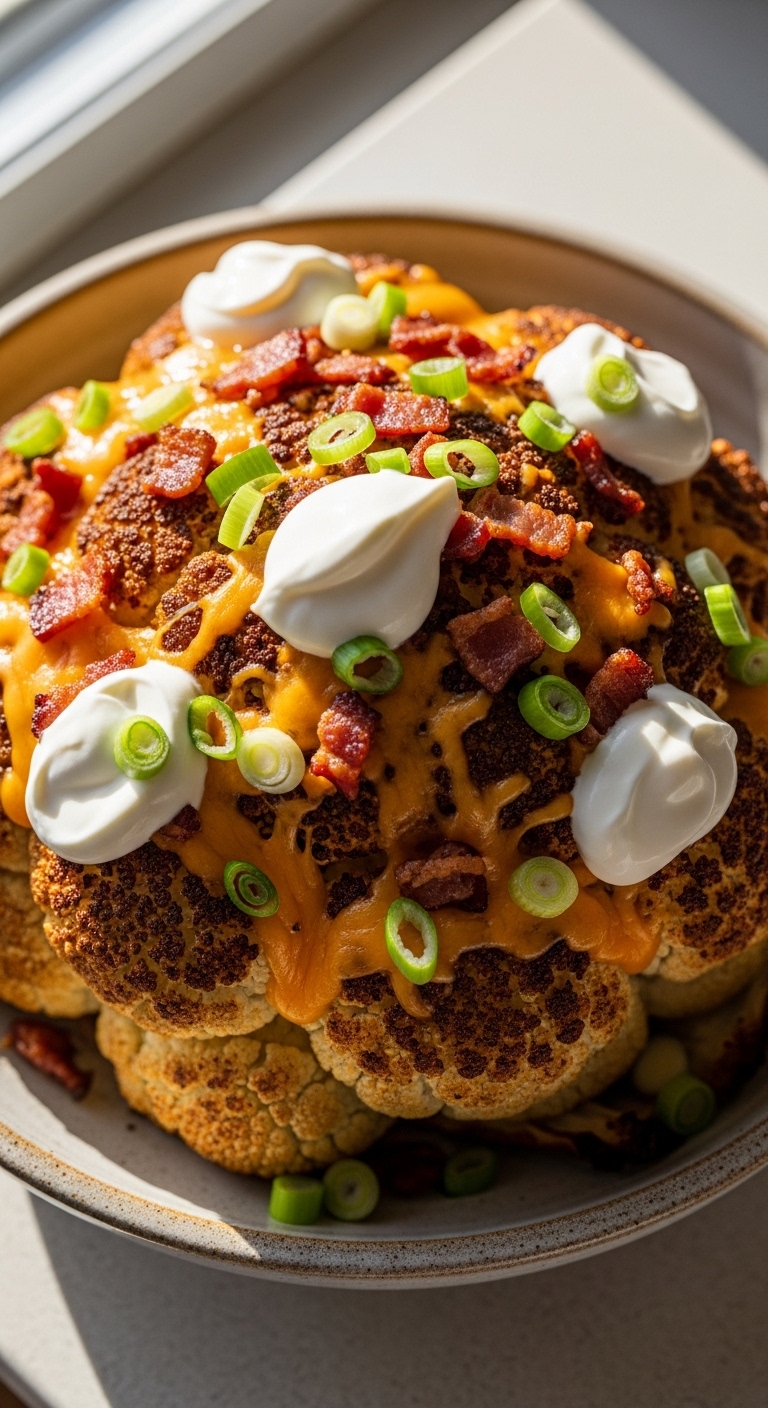
Now we turn roasted cauliflower into comfort food heaven.
Step 1: Add Cheese
Sprinkle shredded cheddar (or your favorite melty cheese) over the hot cauliflower. Place it back in the oven for 3-5 minutes until melted.
Step 2: Top With Bacon
Crispy crumbled bacon adds crunch and savory depth. Turkey bacon works if you prefer leaner options.
Step 3: Add Fresh Touches
- Sprinkle chopped green onions
- Drizzle sour cream or Greek yogurt
- Optional: a dash of hot sauce or fresh parsley
Step 4: Serve Immediately
Loaded roasted cauliflower tastes best hot. Waiting makes it lose that crisp edge.
Flavor Variations You’ll Love
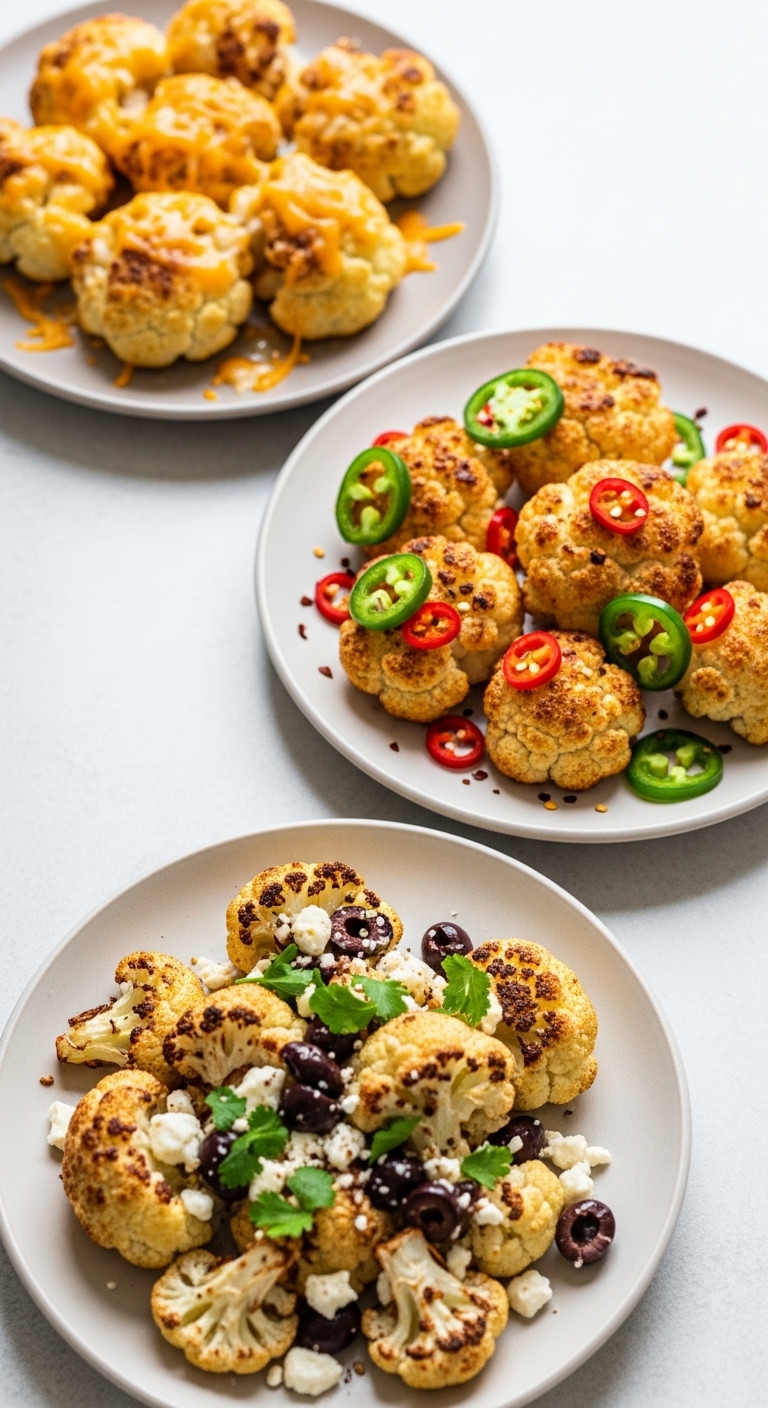
This recipe is versatile. Here are some fun twists:
Spicy Kick
- Add chili powder or cayenne to the seasoning mix
- Top with sliced jalapeños or a drizzle of sriracha
Cheesy Overload
- Mix mozzarella with cheddar for extra gooeyness
- Add a sprinkle of Parmesan before serving
Mediterranean Style
- Toss roasted cauliflower with feta, olives, and a drizzle of olive oil
- Add fresh oregano or basil for a punch of herb flavor
Pairing Ideas
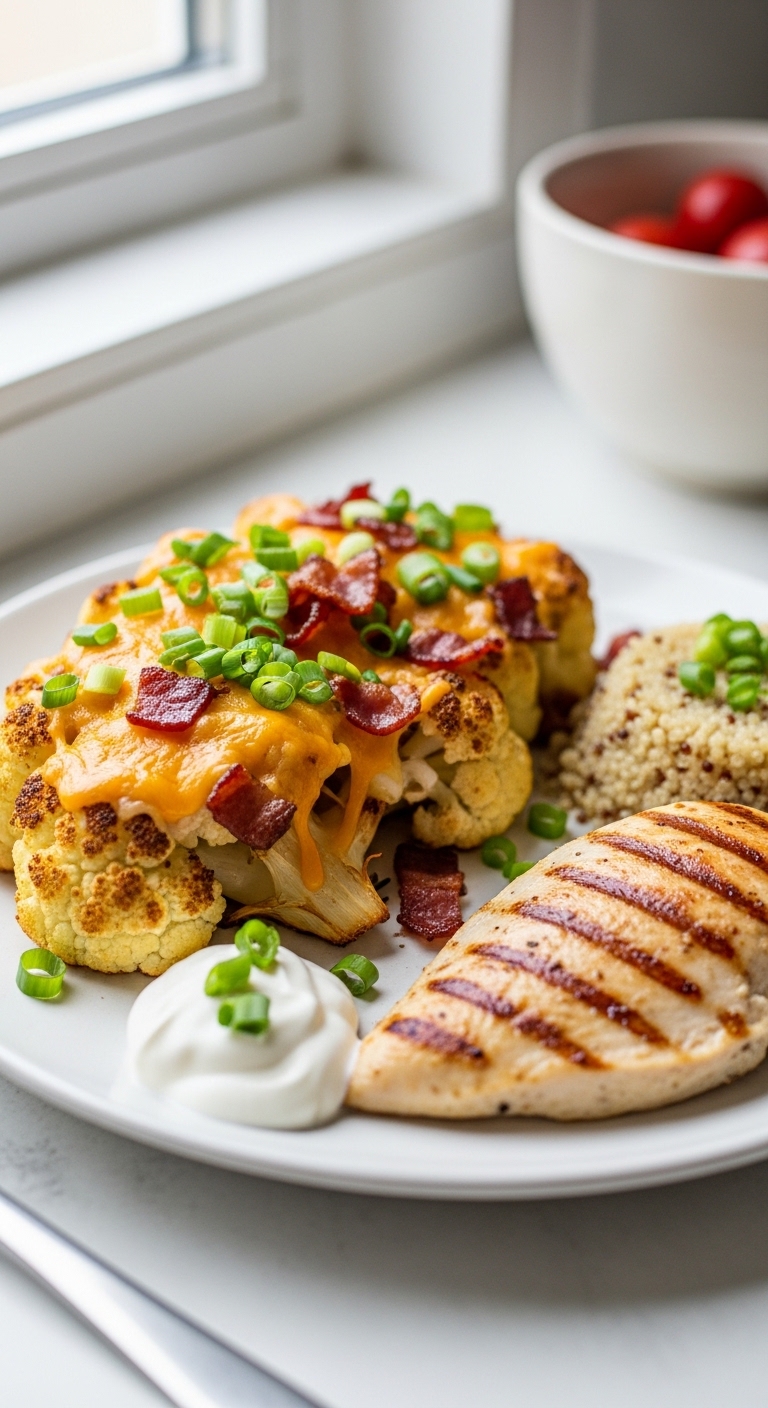
Wondering what goes well with loaded roasted cauliflower? Here are some pairing suggestions:
- Grilled chicken or steak – the cheesy veggie side complements protein perfectly
- Quinoa or rice bowls – add roasted cauliflower for texture and flavor
- Salads – sprinkle warm cauliflower on top for extra richness
- Tacos – yes, roasted cauliflower works amazingly as a taco filling
Ever tried cauliflower tacos? Game-changer. Seriously.
Meal Prep & Storage
Want to make this ahead of time? No problem.
- Refrigeration: Store roasted cauliflower in an airtight container for up to 3 days.
- Reheating: Oven at 375°F (190°C) for 5-10 minutes restores crispness. Avoid microwaving if you want crunch.
- Freezing: Roasted cauliflower freezes well before adding toppings. Freeze in a single layer on a tray, then transfer to a freezer bag.
Meal prep-friendly, but honestly, it disappears so fast you might not need leftovers.
Nutritional Perspective
Let’s keep it real.
- Cauliflower is low in calories and high in fiber.
- Adding cheese and bacon boosts flavor but also adds protein and fat.
- Using Greek yogurt instead of sour cream reduces calories and increases protein.
This dish balances indulgence with veggie goodness. Comfort food that doesn’t feel guilty? Win-win.
Common Mistakes to Avoid
Avoid these rookie errors:
- Overcrowding the pan – causes soggy edges
- Skipping the drying step – no crispiness
- Not seasoning enough – bland florets are a tragedy
- Adding toppings too early – cheese burns, bacon gets soggy
Follow these tips, and your cauliflower will shine every time.
Why This Recipe Beats Regular Roasted Cauliflower
Plain roasted cauliflower is fine, but loaded roasted cauliflower? Next level.
- Texture contrast: Crispy edges with tender centers
- Flavor explosion: Cheese, bacon, herbs, and spices
- Visual appeal: Golden, gooey, and colorful
Ever served plain roasted cauliflower to a crowd and heard crickets? Add the “loaded” factor, and suddenly everyone’s a fan.
Quick Step-by-Step Recap
- Preheat oven to 425°F
- Cut cauliflower into uniform florets
- Dry and season with olive oil, salt, pepper, garlic powder, smoked paprika
- Roast 20-25 minutes until golden
- Add cheese, bacon, green onions, sour cream
- Serve immediately
Simple steps. Big payoff.
When to Make This Recipe
Loaded roasted cauliflower works for:
- Weeknight dinners
- Holiday sides
- Game-day snacks
- Vegetarian gatherings
It’s impressive enough for company but easy enough for casual meals.
Personal Tips From My Kitchen
- Mix textures: Don’t crush the bacon too fine; leave some larger bits.
- Experiment with cheeses: Sharp cheddar gives punch, mozzarella gives gooeyness.
- Serve hot: Texture and flavor drop fast once cooled.
I’ve served this at potlucks and family dinners, and it’s always the first dish to vanish.
Final Thoughts
This loaded roasted cauliflower recipe transforms a humble veggie into the star of the meal. It’s golden, cheesy, crispy, and packed with flavor.
Next time you crave comfort food without going overboard, give this a try. I promise, even cauliflower skeptics will be asking for seconds.
So grab a head of cauliflower, your favorite toppings, and roast your way to veggie heaven. Who said healthy can’t be indulgent?