Old Fashioned Homemade Cleaner: Easy DIY Cleaning Hacks
Ever stared at your grimy countertop and thought, “I wish I had something that actually works, without smelling like a chemical lab exploded”? Yeah, me too. That’s exactly why I started exploring old fashioned homemade cleaner. It’s simple, effective, and honestly a little nostalgic.
I remember my grandma whipping up a little vinegar-and-baking-soda magic while humming in the kitchen. Back then, cleaning didn’t involve a dozen sprays and overpriced bottles; it was just good old DIY ingredients doing their thing. And guess what? Those cleaners still work today. Today, I want to show you how to bring that magic into your home without any fuss.
Why Old Fashioned Homemade Cleaner Works Better Than You Think
You might be thinking, “Sure, but why bother with old-fashioned stuff? Aren’t store-bought cleaners stronger?” Funny enough, sometimes simplicity beats complexity.
Old-fashioned cleaners use basic, natural ingredients—things you likely already have. No secret chemicals, no harsh smells, no need to read a small-print warning that makes your head spin.
What makes them effective:
- Natural acids and bases (vinegar, lemon, baking soda) break down dirt and grease.
- Essential oils can boost cleaning power and leave a subtle scent.
- Versatility: Same mixture often works on counters, sinks, mirrors, and even floors.
Ever noticed how modern “miracle” cleaners sometimes just move dirt around instead of actually cleaning? Yeah… old-fashioned methods don’t play games.
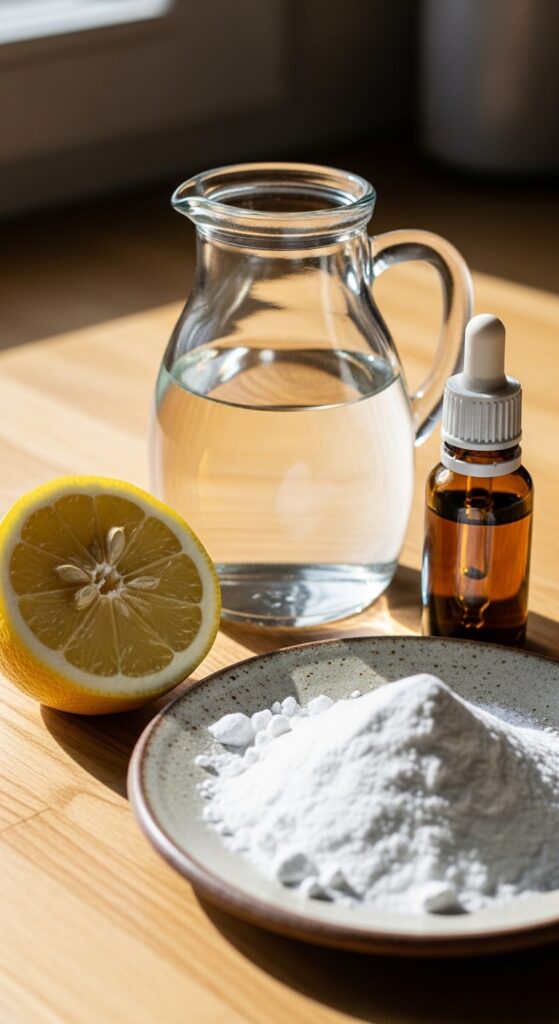
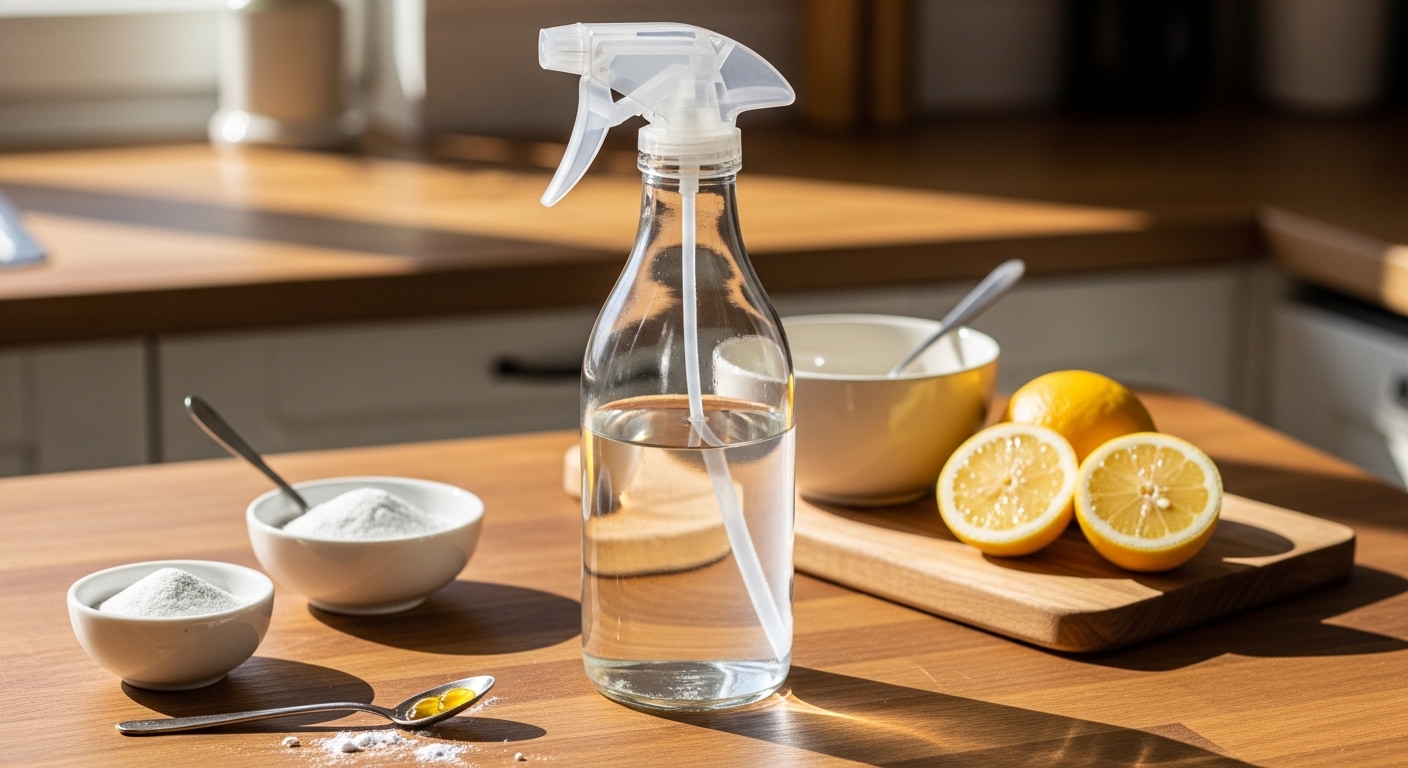
Essential Ingredients for Old Fashioned Homemade Cleaner
Before we get messy, let’s talk ingredients. FYI, these are cheap, natural, and probably already in your pantry:
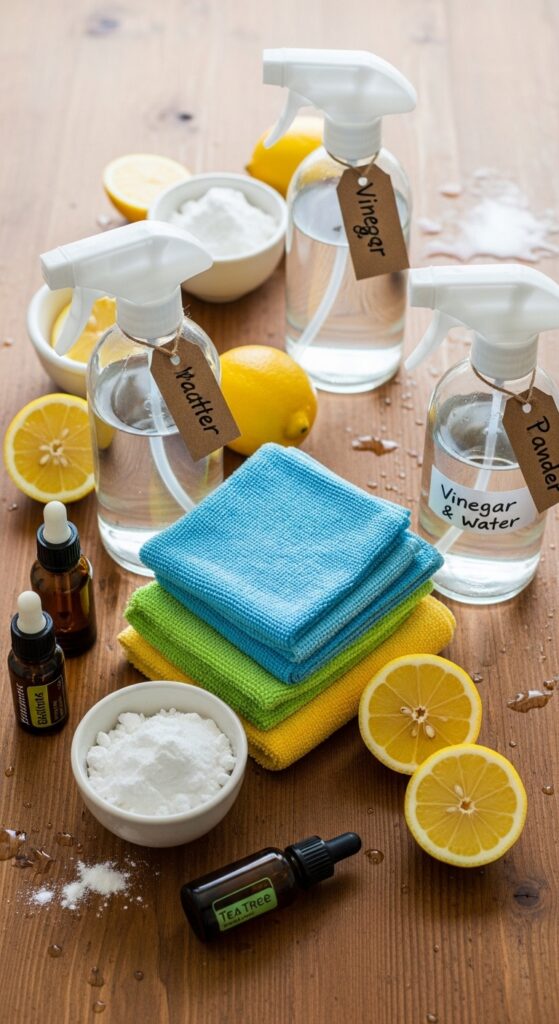
Vinegar
White vinegar is a miracle worker. It’s acidic, so it dissolves grease, kills some germs, and helps remove hard water stains. IMO, it’s the MVP of old-fashioned cleaning.
Baking Soda
Baking soda is abrasive but gentle. Great for scrubbing sinks, tubs, and stovetops without scratching surfaces. Bonus: it also neutralizes odors.
Lemon Juice
Lemon juice adds natural acidity and a refreshing scent. Use it on cutting boards, sinks, and even the microwave for a citrusy sparkle.
Essential Oils (Optional)
Lavender, tea tree, or lemon oils are optional but enhance cleaning power and leave your space smelling fresh. Tea tree oil even has antimicrobial properties.
Water
Sometimes, all you need is good ol’ water to dilute or mix these ingredients into a usable spray.
Quick Tip: Mixing these ingredients in different ratios lets you tackle different cleaning challenges, so feel free to experiment.
How to Make Old Fashioned Homemade Cleaner
Now comes the fun part: actually making the cleaner. Here’s a simple method that’s my personal favorite.
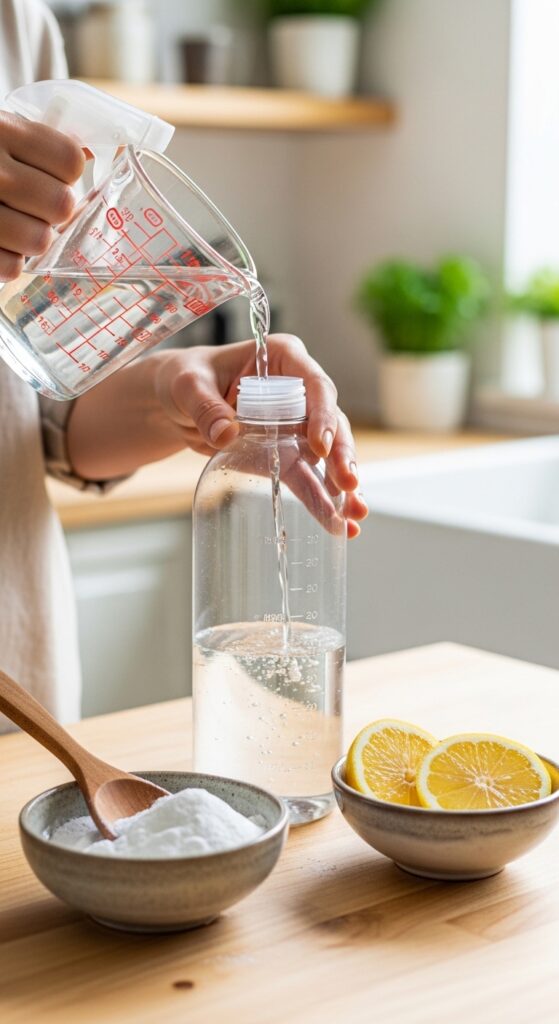
All-Purpose Spray
Ingredients:
- 1 cup white vinegar
- 1 cup water
- 10–15 drops essential oil (optional)
Instructions:
- Mix vinegar and water in a spray bottle.
- Add essential oils if you like.
- Shake well before each use.
This spray works wonders on countertops, glass, mirrors, and even tiles. Just spray, wipe, and admire the shine.
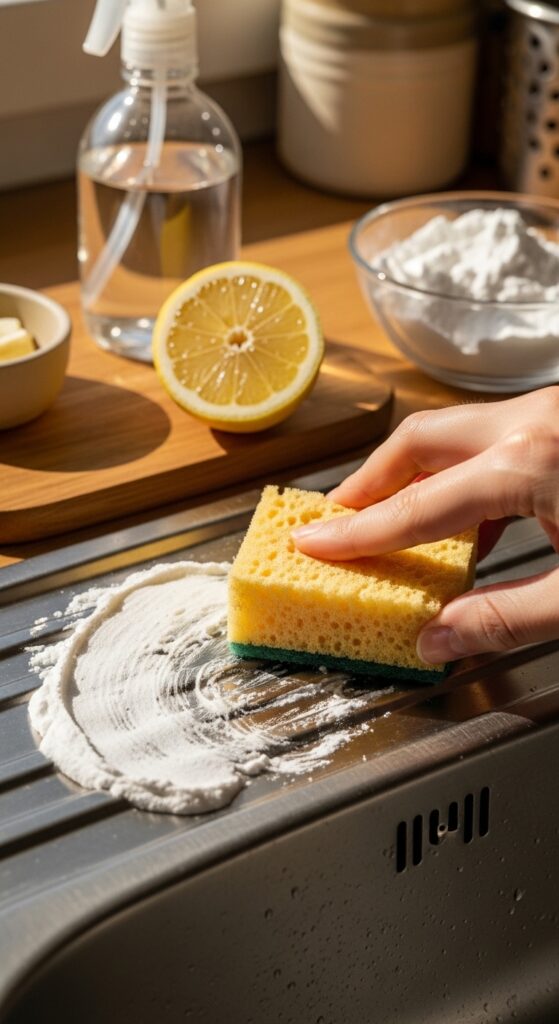
Baking Soda Paste
Ingredients:
- 1/2 cup baking soda
- Enough water to make a paste
Instructions:
- Mix baking soda with water until it forms a thick paste.
- Apply to sinks, stovetops, or tubs.
- Scrub gently with a sponge and rinse.
This paste is especially good for stubborn grime. It’s abrasive enough to clean without damaging surfaces.
Lemon-Vinegar Cleaner
Ingredients:
- 1/2 cup lemon juice
- 1/2 cup vinegar
- 1 cup water
Instructions:
- Mix all ingredients in a spray bottle.
- Spray on hard water stains or greasy surfaces.
- Let sit 5–10 minutes, then wipe.
Lemon adds a fresh scent while boosting vinegar’s cleaning power. Perfect for kitchens and bathrooms.
Benefits of Using Old Fashioned Homemade Cleaner
Why would you bother switching from commercial cleaners? Here’s why I stick to old-fashioned methods:
- Cost-effective: No need to buy expensive sprays. A few pantry items go a long way.
- Eco-friendly: Reduces plastic waste and harmful chemicals.
- Non-toxic: Safer around kids, pets, and your sensitive nose.
- Customizable: Want stronger scent or more scrubbing power? Adjust your mix.
- Versatile: Use the same ingredients for multiple surfaces, unlike some fancy cleaners that are surface-specific.
Honestly, it feels satisfying knowing you’re cleaning efficiently without all the chemical overload.
Common Cleaning Mistakes to Avoid
Even the best homemade cleaner can flop if you misuse it. Here are a few mistakes I’ve made (so you don’t have to):
- Overusing vinegar on natural stone: Vinegar is acidic and can damage granite or marble. Stick to water-based cleaners there.
- Not rinsing baking soda paste: Residue can leave a white film if not wiped thoroughly.
- Using lemon on stainless steel: It can etch the surface if left too long.
- Ignoring safety with essential oils: Some oils can irritate skin if concentrated. Always dilute.
Avoid these, and your DIY cleaner will shine like a pro’s.
How to Tackle Tough Stains with Old Fashioned Methods
Not all messes are created equal. Here’s how I handle the stubborn ones:
Grease and Oil Stains
Sprinkle baking soda over the grease, let it sit 10 minutes, then scrub gently. Vinegar spray afterward lifts the remaining residue.
Hard Water Stains
Use lemon juice or vinegar on the stains. Let it sit 5–10 minutes. Scrub lightly and rinse. Voila, sparkle restored.
Soap Scum
Mix baking soda and vinegar into a paste, apply, let fizz for a few minutes, scrub, and rinse. Soap scum fears this combo.
Stains on Cutting Boards
Rub half a lemon over the surface, sprinkle with salt if needed. Rinse and dry. Goodbye, ghost stains from last week’s spaghetti.
Homemade Cleaner vs. Commercial Cleaner
Let’s be honest. Commercial cleaners are convenient, but sometimes they feel like overkill. Here’s my take:
Pros of Homemade Cleaners:
- Cheap and natural
- Flexible and adjustable
- Safer for the environment and family
Cons:
- May require more elbow grease
- Takes time to prepare
- Limited shelf life if you make it in small batches
Pros of Commercial Cleaners:
- Ready-to-use
- Fast-acting
- Specialized for certain surfaces
Cons:
- Expensive over time
- Chemical fumes and residue
- Less environmentally friendly
IMO, homemade cleaners win for everyday use. Commercial cleaners? Keep them for emergency situations.
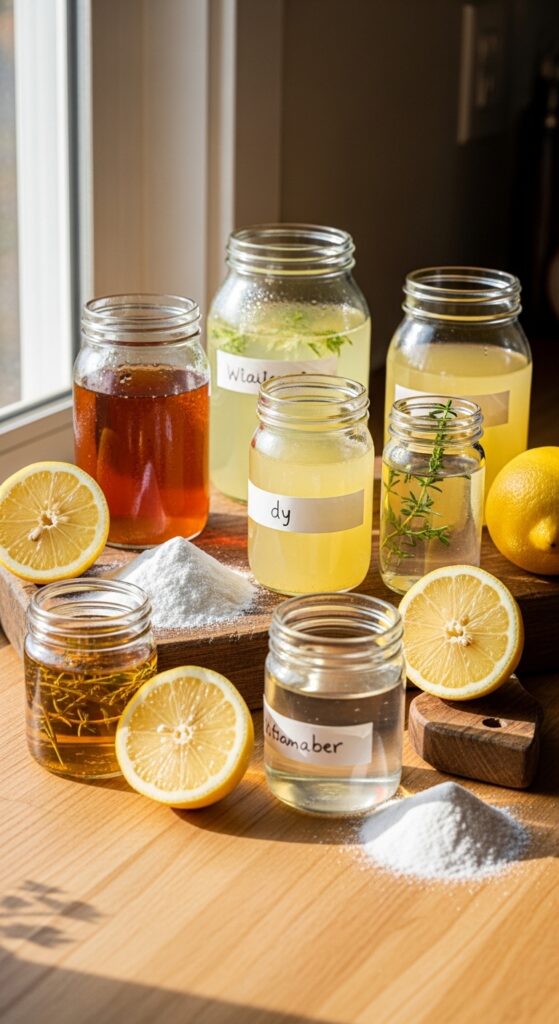
Storage Tips for Homemade Cleaner
You don’t want your DIY cleaner to go bad. Here’s how I store mine:
- Use spray bottles or jars with tight lids
- Label everything (otherwise you’ll confuse vinegar spray with water later ugh)
- Store in a cool, dark place to preserve essential oils and freshness
- Shake before use to mix ingredients that may settle
Proper storage keeps your homemade solution effective for months.
Extra Tricks to Make Cleaning Fun
Cleaning doesn’t have to feel like punishment. I’ve discovered a few ways to make it enjoyable:
- Add a pleasant scent: Essential oils not only help clean but make your home smell amazing.
- Play music or podcasts: Makes the process feel faster.
- Use small spray bottles: Cute, easy, and reduces waste.
- Gamify it: Challenge yourself to beat the last cleaning time.
Cleaning with old-fashioned methods can actually feel satisfying once you see results immediately.
Old Fashioned Cleaner for Different Surfaces
Not every surface is created equal. Here’s what works where:
- Countertops: Vinegar and water spray works on most, except natural stone.
- Mirrors and glass: Vinegar and water leaves a streak-free shine.
- Sinks and tubs: Baking soda paste handles grime effortlessly.
- Floors: Mild vinegar solution works on tiles and linoleum.
- Wood furniture: Avoid vinegar; use a mild soap and water mixture.
One cleaner doesn’t fit all, but a few variations cover most household tasks.
Safety Considerations
Even natural cleaners need common sense.
- Keep out of reach of children and pets
- Don’t mix with bleach (creates toxic fumes)
- Test on a small area if using on delicate surfaces
- Wear gloves if you have sensitive skin
A little caution ensures your cleaning sessions are safe and stress-free.
Why I Keep Coming Back to Old Fashioned Homemade Cleaner
Honestly, it feels good knowing I’m using something simple, natural, and effective. No harsh smells, no expensive bottles, just ingredients I trust. Plus, seeing a sparkling countertop after a few minutes of effort is oddly satisfying.
I’ve tried plenty of fancy products, and sometimes they work… sometimes they don’t. Homemade cleaner? Always reliable, always under my control.
DIY Cleaner for Special Tasks
Sometimes you need a little extra punch:
Microwave Cleaning
Fill a bowl with water and a few slices of lemon. Microwave 3 minutes, then wipe down. Steam loosens stuck-on food while lemon adds a fresh scent.
Oven Cleaning
Mix baking soda and water into a paste. Apply to oven surfaces, let sit overnight, wipe clean, spray with vinegar if needed. Works like a charm.
Refrigerator Cleaning
Vinegar and water spray plus a microfiber cloth removes odors and spills without harsh chemicals.
Trash Can Deodorizer
Sprinkle baking soda at the bottom. Keeps stinky smells at bay and adds an extra layer of cleaning.
Final Thoughts
Old fashioned homemade cleaner proves that you don’t need fancy chemicals to get sparkling results. Vinegar, baking soda, lemon, and a dash of essential oil can tackle almost any household mess.
So next time you reach for a store-bought spray, pause and consider your pantry first. Mix up a batch, enjoy the nostalgia, and maybe even have a little fun while cleaning. After all, a clean home doesn’t have to feel like a chore when you do it the old-fashioned way.
Trust me once you experience the effectiveness and simplicity of old fashioned homemade cleaner, you’ll wonder why you ever spent a fortune on commercial products.