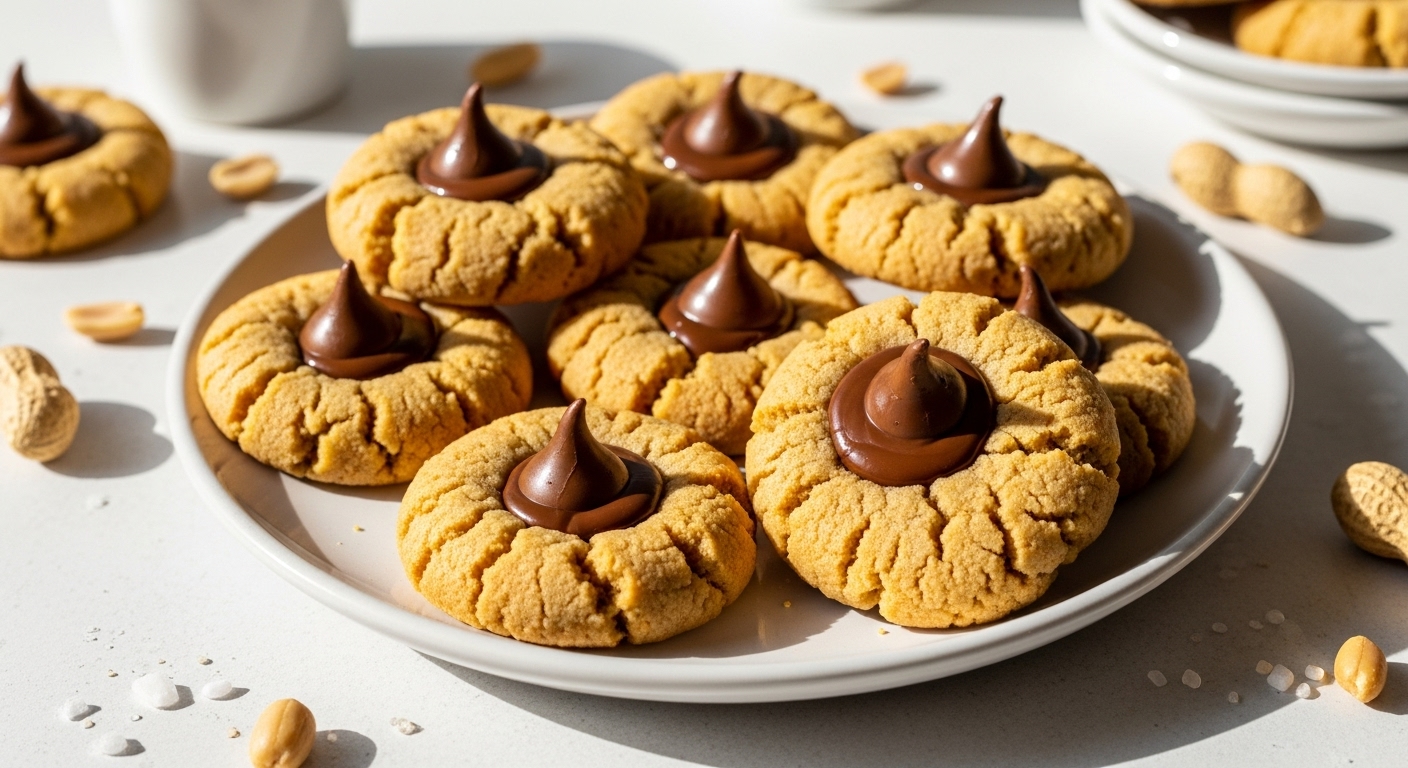
How to Make Soft & Chewy Peanut Butter Blossom Cookies
Ever had a cookie that makes you stop mid-bite and just… stare at it like, “Wow. Life is good”? Yeah, Peanut Butter Blossom Cookies are that cookie. Soft, chewy peanut butter goodness topped with a perfectly melty chocolate kiss if cookies were superheroes, these would be Batman (minus the brooding, hopefully).
I first tried these bad boys years ago, and honestly? I’ve been obsessed ever since. There’s just something magical about that peanut butter and chocolate combo. And FYI, they’re surprisingly easy to make at home even if your baking skills are somewhere between “I can boil water” and “I once microwaved a cake.”
So, buckle up. We’re going full-on cookie nerd mode. I’m spilling all my secrets, tips, and the why-you-need-these-in-your-life insights.
What Makes Peanut Butter Blossom Cookies So Irresistible?
Before we talk recipe hacks, let’s chat about what makes these cookies legendary.
The Peanut Butter Base
The soft, chewy peanut butter dough is the heart of these cookies. Here’s why it rocks:
- Texture: Perfect balance of soft on the inside, slightly crisp on the edges.
- Flavor: Rich, nutty, slightly salty, and pairs beautifully with chocolate.
- Versatility: You can tweak the peanut butter type—creamy, chunky, even natural—for slightly different vibes.
Ever wondered why peanut butter and chocolate are such a dream team? It’s science, friends. The saltiness of peanut butter enhances the sweetness of chocolate, creating a combo that’s basically impossible to resist.
The Chocolate Kiss Top
Ah, the iconic Hershey’s Kiss (or any chocolate drop of your choice). It’s not just decoration it’s a flavor bomb:
- Melts perfectly into the soft dough while keeping its signature shape.
- Adds that glossy, indulgent chocolate hit with every bite.
- Creates that signature “blossom” look we all secretly Instagram.
Honestly, if cookies had a red carpet, these would be walking it.
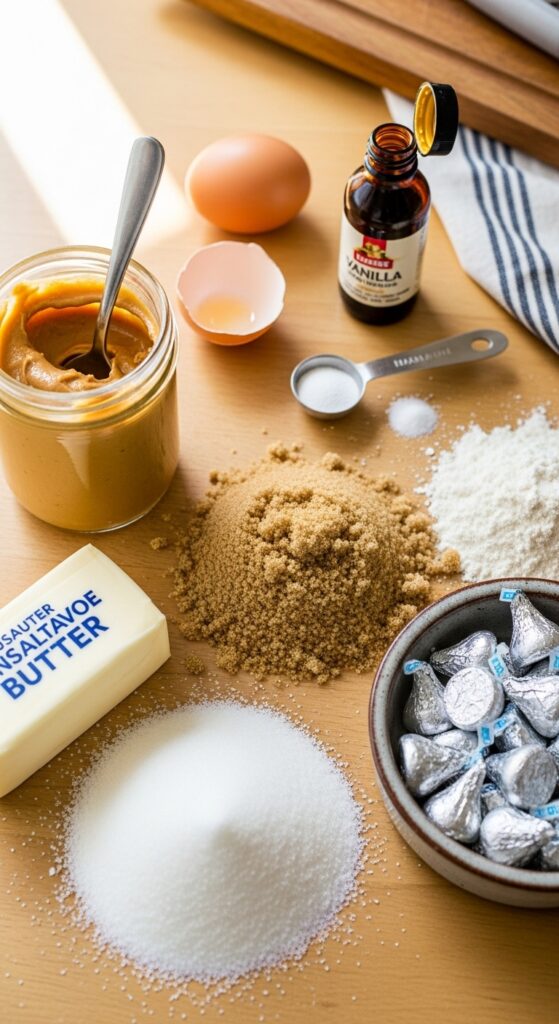
Ingredients: What You’ll Need
Alright, here’s the real deal what goes into these heavenly bites:
- 1/2 cup butter, softened – Yes, butter makes everything better.
- 1/2 cup granulated sugar – Sweet but not overpowering.
- 1/2 cup brown sugar – Adds chewiness and depth.
- 1/2 cup peanut butter – Creamy or chunky, your call.
- 1 large egg – The binder.
- 1 1/2 cups all-purpose flour – Cookies love this.
- 3/4 teaspoon baking soda – Helps them rise just right.
- 1/2 teaspoon salt – Enhances flavor.
- 1 teaspoon vanilla extract – Adds warmth.
- Chocolate kisses – One per cookie.
Quick tip: Don’t skimp on the peanut butter. It’s literally the star here.
Step-By-Step: How to Make Peanut Butter Blossom Cookies
Now, let’s get into the fun part actually baking them. Don’t worry, I won’t leave you hanging with vague instructions like “bake until done.”
Step 1: Prep Your Base
- Preheat your oven to 375°F (190°C).
- Line a baking sheet with parchment paper. Trust me, cleanup is way easier.
- In a bowl, cream together butter, sugars, and peanut butter until smooth.
- Beat in the egg and vanilla.
You’ll notice the dough smells like heaven. At this stage, you might be tempted to eat it raw. Don’t. Your stomach will protest, trust me.
Step 2: Mix Dry Ingredients
- Combine flour, baking soda, and salt in a separate bowl.
- Slowly fold the dry mix into the wet mixture until it’s all one cohesive dough.
Pro tip: Don’t overmix. The less you stir, the softer your cookies will be.
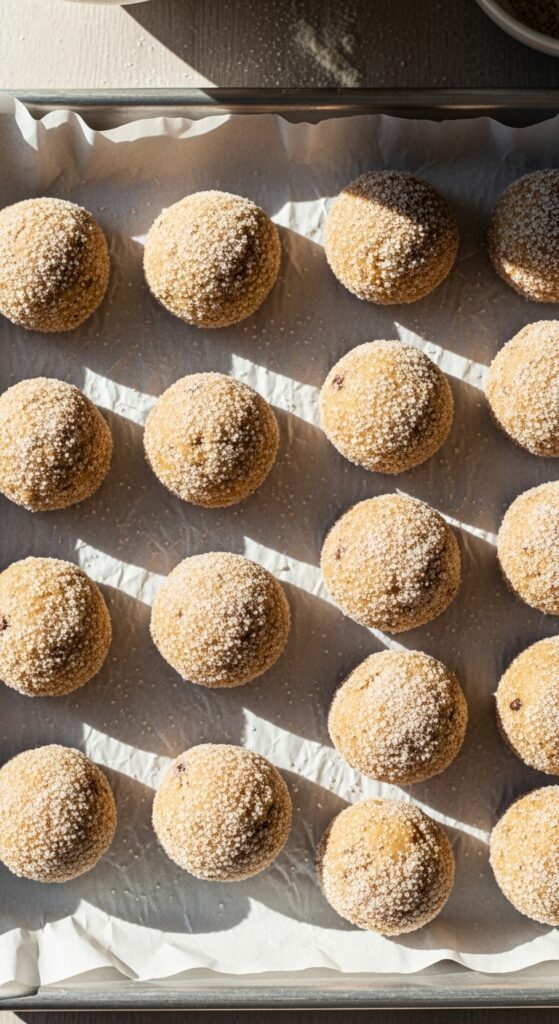
Step 3: Shape the Cookies
- Scoop 1-inch dough balls and roll them in granulated sugar.
- Place them 2 inches apart on your baking sheet.
- Bake for 8–10 minutes, until the edges are slightly golden but centers are soft.
Ever wonder why cookies look perfect in magazines but never in real life? It’s all about spacing and timing, my friend.
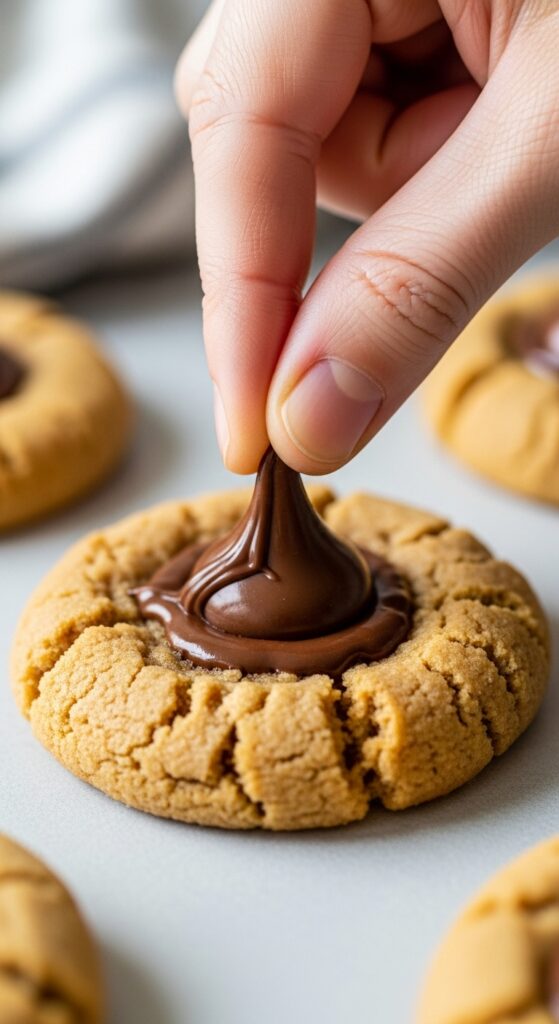
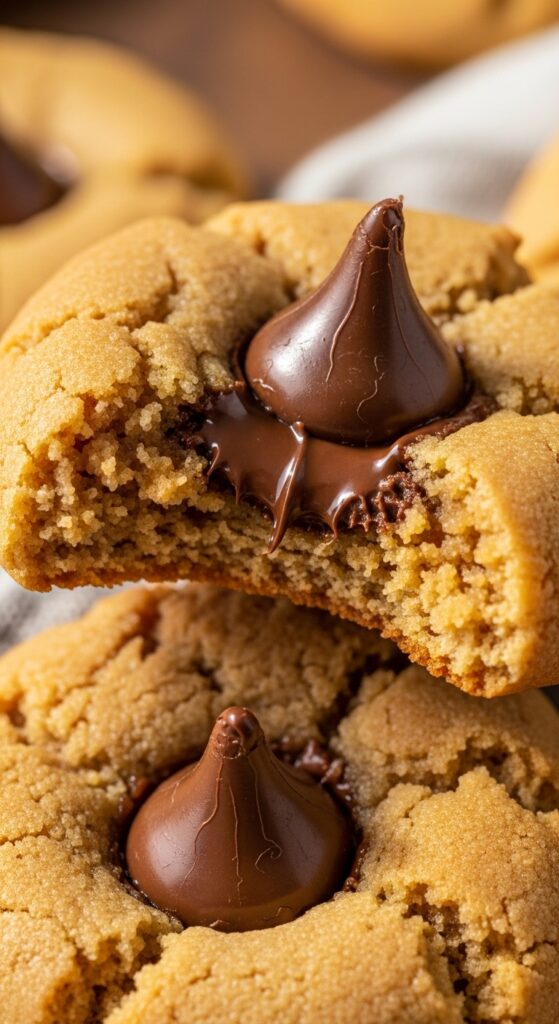
Step 4: Add the Chocolate Kiss
- Immediately after taking the cookies out, press a chocolate kiss into the center of each cookie.
- Let them cool for a few minutes before moving they’ll firm up but remain chewy.
Fun fact: The chocolate softens without melting into a puddle because the cookie is still warm not hot. Timing matters, folks!
Tips for Perfect Cookies Every Time
No one wants a cookie disaster. Here’s my personal tricks for flawless Peanut Butter Blossoms:
- Chill the dough: If your kitchen is hot, pop the dough in the fridge for 20–30 mins. It prevents flat cookies.
- Use quality chocolate: It doesn’t have to be fancy, but better chocolate = better taste.
- Don’t overbake: Remember, cookies continue cooking after you take them out. Take them out slightly underdone.
- Roll in sugar: This gives the cookie a sweet, slightly crunchy exterior. IMO, it’s non-negotiable.
Variations to Try
Once you master the classic, you can get a little creative. Some of my favorites:
- Double chocolate: Add cocoa powder to the dough and use dark chocolate kisses.
- Salted caramel: Replace the kiss with a caramel candy and sprinkle sea salt on top.
- Nutty twist: Add chopped peanuts for extra crunch.
Ever tried putting a Reese’s peanut butter cup in the center instead of a kiss? Game-changer. Just saying.
Storing & Freezing Tips
Let’s face it: cookies disappear fast. So here’s how to keep them:
- Room temp: Store in an airtight container for up to 5 days.
- Freezing dough: Roll into balls, freeze on a baking sheet, then transfer to a freezer bag. Bake from frozen for 10–12 mins.
- Freezing baked cookies: Layer with parchment paper in an airtight container; thaw at room temp for 30 mins.
Honestly, I’ve found that freezing dough is the lifesaver. You can bake fresh cookies whenever the craving hits.
Why These Cookies Are Perfect for Every Occasion
You might be thinking, “Cookies are cookies… why hype these?” Here’s why:
- Holiday magic: They scream Christmas vibes with chocolate kisses.
- Kids love ’em: The fun shape + chocolate center = instant crowd-pleaser.
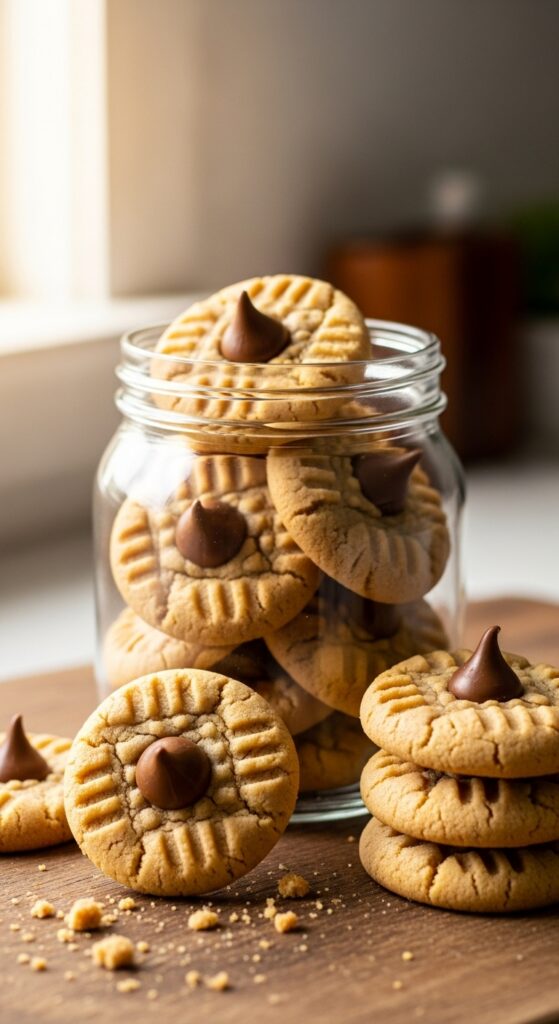
- Giftable: Stack them in a jar, tie with a ribbon, and boom—you’re a hero.
And the best part? They’re universally loved. Seriously, I’ve never met anyone who said, “Nah, I don’t like these.”
Common Mistakes & How to Avoid Them
Even seasoned bakers mess up sometimes. Here’s what to watch for:
- Cookies too flat: Chill dough, don’t overmix, and use fresh baking soda.
- Chocolate melts too much: Add immediately after baking, not while piping hot.
- Bland taste: Salt + vanilla are your best friends. Don’t skip.
Learning from mistakes makes you a better baker and keeps your friends impressed.
FAQs
Q: Can I use natural peanut butter?
A: Yes, but your dough might be a bit stickier. Chill it longer for easier handling.
Q: Can I make them vegan?
A: Totally. Swap butter for coconut oil, egg for flax egg, and choose dairy-free chocolate.
Q: How do I make them extra chewy?
A: Slightly underbake them and use brown sugar. That’s the secret chew factor.
Final Thoughts
So there you have it a complete guide to Peanut Butter Blossom Cookies that’s fun, easy, and guaranteed to wow. These cookies are soft, chewy, and the chocolate kiss on top is literally the cherry on the peanut butter sundae.
Honestly, baking these feels like a little happiness injection. Every time I make them, I end up sneaking more than a few (don’t tell anyone 😉).
Next time you’re craving a cookie that’s sweet, nutty, and downright irresistible, give these a shot. Your taste buds will thank you and your friends will bow down.
So… are you ready to make some magic in your kitchen today? I promise, the first bite will be love at first chew.