Easy Peppermint Bark Recipe That Tastes Better Than Store-Bought
You want a peppermint bark recipe that actually works. Not the kind that looks cute on Pinterest and then melts into a weird peppermint swamp. I’ve made this more times than I can count, usually late at night, usually while “just tasting a piece” turns into half the tray disappearing. Worth it.
Peppermint bark hits that sweet spot between lazy and impressive. You melt some chocolate, smash some candy canes, and suddenly people think you planned ahead. Ever wonder why this stuff shows up at every holiday party? Yeah. It knows what it’s doing.
Let’s make it properly. No drama. No mystery steps. Just crisp layers, clean breaks, and that perfect minty crunch.
Why This Peppermint Bark Recipe Always Wins
I’ve tested a lot of peppermint bark versions. Some taste waxy. Some snap your teeth in half. Some melt if you look at them wrong. This one avoids all that.
Here’s why it works so well:
- Balanced sweetness so the peppermint never screams.
- Clean layers that break instead of crumble.
- Simple ingredients you can find anywhere.
- No baking because honestly, who wants to turn on the oven?
IMO, this recipe nails the classic vibe without turning into a sugar bomb. Ever eaten bark that tastes like toothpaste dipped in chocolate? Yeah, we’re not doing that.
Ingredients You’ll Need (Nothing Weird, I Promise)
This peppermint bark recipe keeps the ingredient list short and sane. You don’t need specialty chocolate or fancy tools.
Core Ingredients
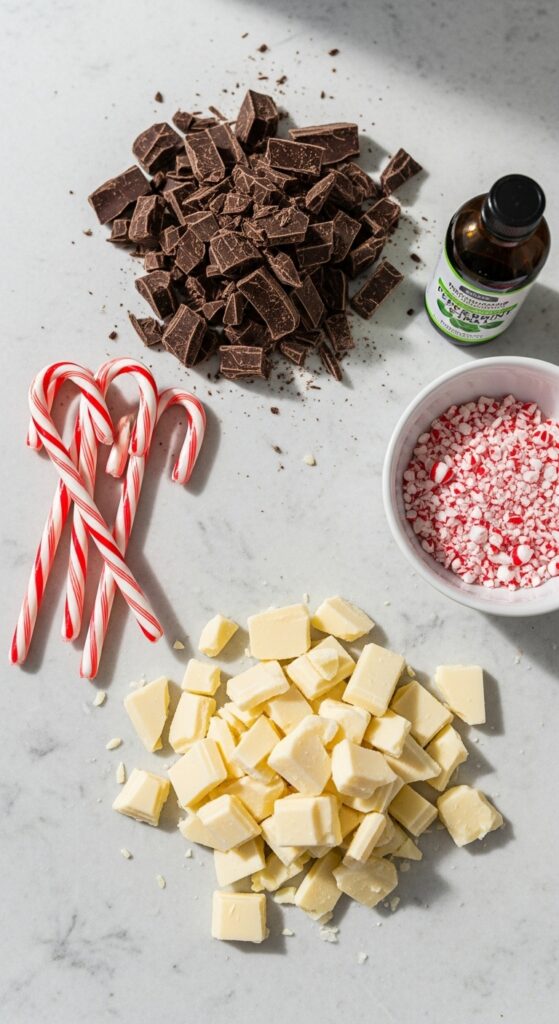
- 12 oz semi-sweet chocolate, chopped
- 12 oz white chocolate, chopped
- 1 teaspoon peppermint extract
- 4–5 candy canes, crushed
That’s it. No corn syrup. No food coloring. No unnecessary nonsense.
Ingredient Tips That Matter
- Use real chocolate, not candy melts, if you want better flavor.
- Choose peppermint extract, not mint extract. Big difference.
- Crush candy canes into small shards, not dust. Texture matters.
FYI, cheap white chocolate still works fine here. I save the fancy stuff for eating straight from the bar 🙂
Tools That Make Life Easier
You don’t need a culinary degree, but a few basics help.
- Microwave-safe bowls
- Parchment paper
- Baking sheet
- Spatula
- Zip-top bag or rolling pin for crushing candy canes
Ever tried peeling bark off bare foil? Don’t. Just don’t.
Step-by-Step Peppermint Bark Recipe
This section matters. Read it once before you start. You’ll thank yourself later.
Step 1: Prep Your Pan
Line a baking sheet with parchment paper. Make sure it lays flat.
This step prevents sticking and saves your sanity. No shortcuts here.
Step 2: Melt the Dark Chocolate Layer
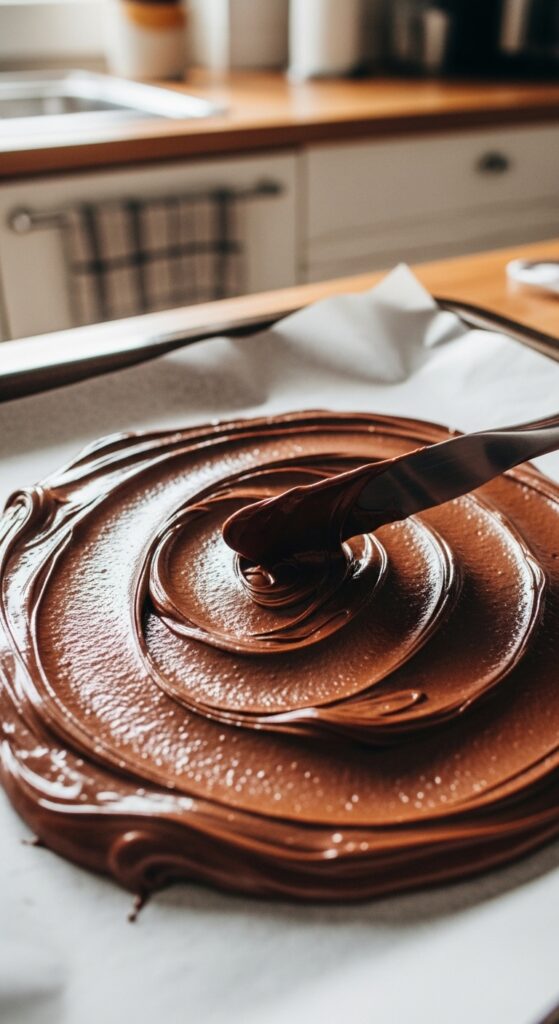
Add the semi-sweet chocolate to a bowl.
- Microwave for 30 seconds
- Stir
- Repeat until smooth
Stir every time. Chocolate burns fast, and burnt chocolate ruins moods.
Pour the melted chocolate onto the parchment-lined sheet. Spread it into an even layer, about 1/4 inch thick.
Pop the pan into the fridge for 10–15 minutes, until firm but not rock-hard.
Ever rushed this step and mixed layers together? Same. Learn from my pain.
Step 3: Melt the White Chocolate
Use a clean bowl. White chocolate hates water and leftover crumbs.
Melt it the same way:
- 30 seconds
- Stir
- Repeat
Once smooth, stir in peppermint extract. Mix well.
Go easy here. Too much extract turns festive into mouthwash real fast.
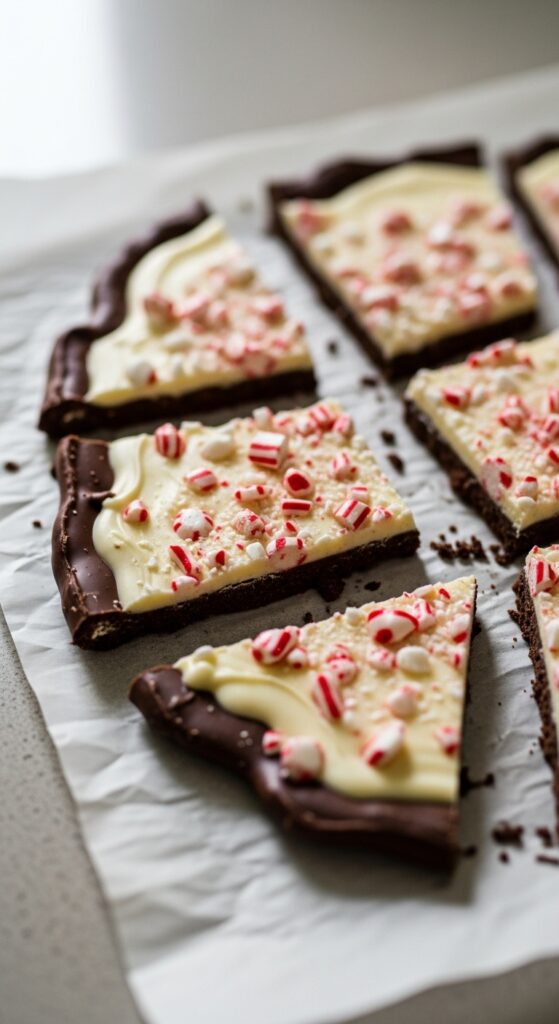
Step 4: Add the White Chocolate Layer
Pull the pan from the fridge.
Pour the white chocolate over the dark layer. Spread gently so you don’t dig trenches.
Immediately sprinkle crushed candy canes over the top.
Press them in lightly so they stick. Don’t mash them like you’re angry at them.
Step 5: Chill and Set
Place the pan back in the fridge.
Let it chill for 30–45 minutes, until fully set.
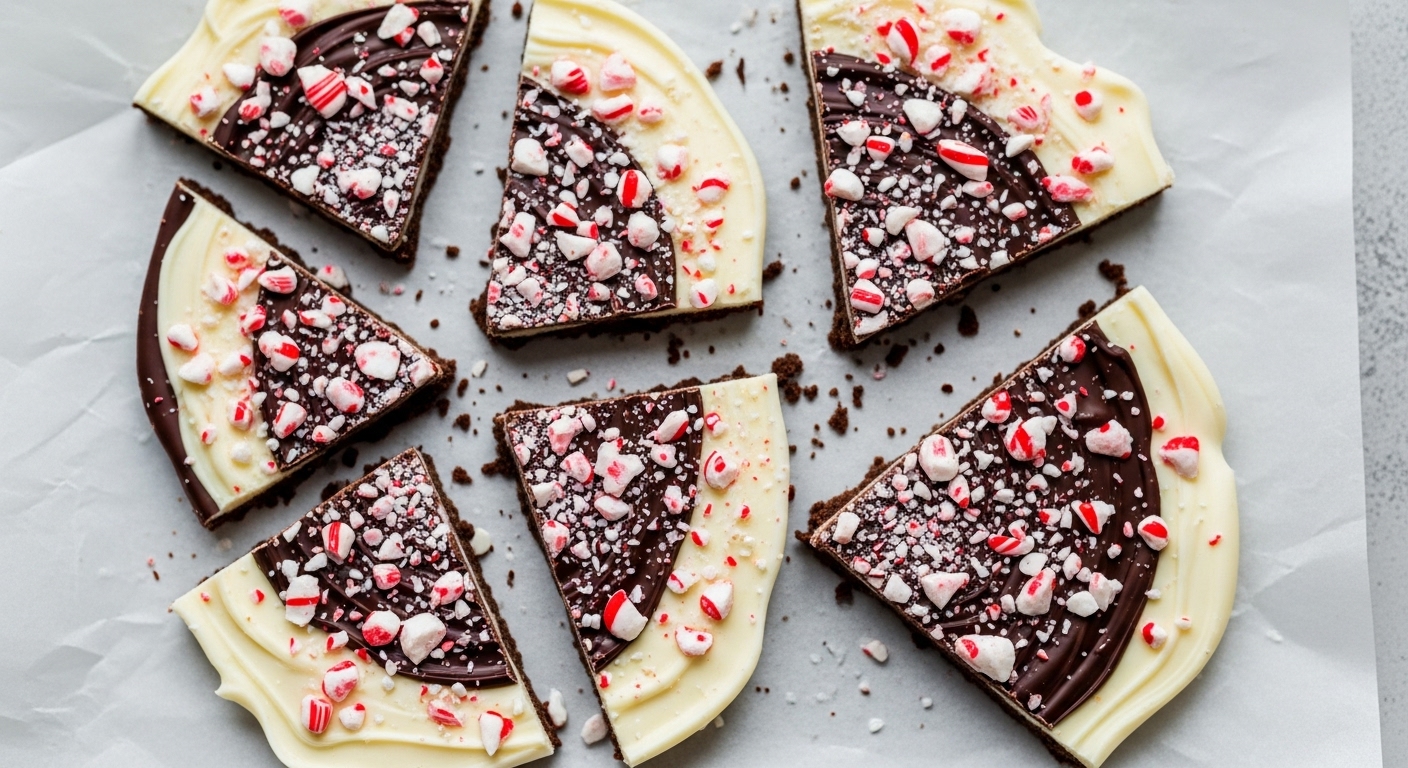
Once firm, lift the parchment and break the bark into pieces by hand.
Congrats. You just made peppermint bark that doesn’t look sad.

Common Peppermint Bark Mistakes (And How to Avoid Them)
Even simple recipes trip people up. Let’s dodge the usual mess.
Mistake 1: Chocolate That Won’t Set
This usually happens when you overheat it.
Fix it by:
- Melting slowly
- Stirring often
- Letting layers cool properly
Chocolate rewards patience. It punishes shortcuts.
Mistake 2: Overpowering Mint Flavor
Peppermint extract packs a punch.
Stick to 1 teaspoon, max. You can always add more next time.
Ever bitten into bark and felt your sinuses open instantly? Yeah, that’s the danger zone.
Mistake 3: Candy Canes Bleeding Color
This happens when moisture gets involved.
Keep everything dry. Add candy canes right after spreading white chocolate, not later.
Variations on the Classic Peppermint Bark Recipe
Once you master the base, you can play around.
Dark Chocolate Only Version
Skip the white chocolate entirely.
- Use two layers of dark chocolate
- Sprinkle candy canes between layers
This version tastes less sweet and more grown-up. I make this when I want bark and self-respect.
Milk Chocolate Peppermint Bark
Swap semi-sweet for milk chocolate.
This works great for kids or anyone with a serious sweet tooth.
Just expect a softer snap.
Triple Chocolate Peppermint Bark
Yes, this exists.
- Dark chocolate base
- Milk chocolate middle
- White chocolate top
Layer carefully and chill between each pour.
Is it extra? Absolutely. Is it worth it? Also yes.
How to Store Peppermint Bark Without Ruining It
Storage matters more than people admit.
Short-Term Storage
- Store in an airtight container
- Keep in the fridge
- Use parchment between layers
This keeps the bark crisp and clean.
Long-Term Storage
You can freeze peppermint bark.
- Wrap tightly
- Freeze up to 2 months
- Thaw in the fridge, not on the counter
Chocolate hates temperature shock. Treat it gently.
Can You Make Peppermint Bark Ahead of Time?
Yes. Please do.This peppermint bark recipe actually improves after a day in the fridge. The layers settle, and the flavors calm down.
Make it up to one week ahead for gifting or parties.
Ever tried making this the night before guests arrive and panicked at midnight? Been there. Planning helps.
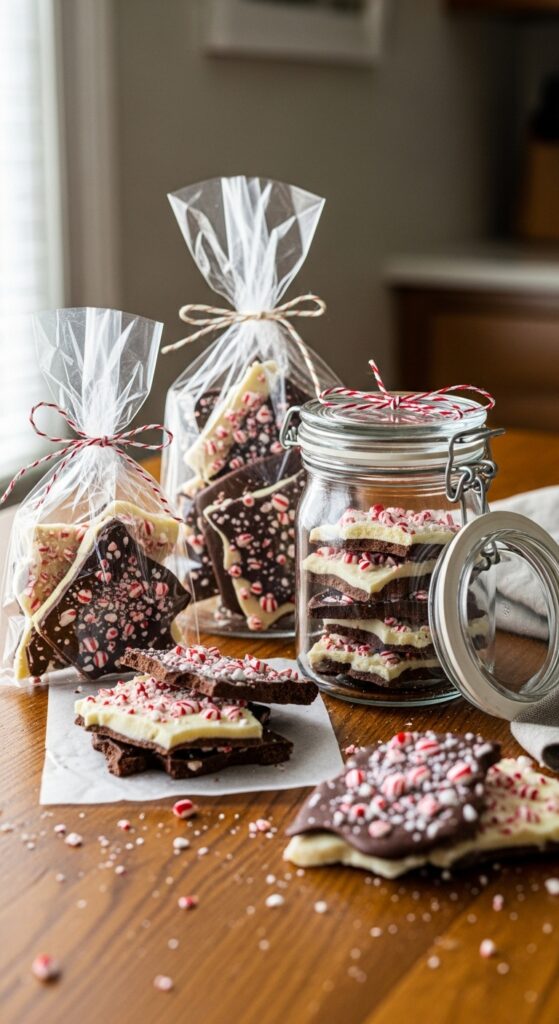
Peppermint Bark for Gifting (Because People Love It)
This recipe shines as a homemade gift.
Easy Gift Ideas
- Clear cellophane bags
- Mason jars
- Holiday tins
Add a handwritten note. People eat that up almost as much as the bark.
How Much This Recipe Makes
One batch yields about 1.5 pounds of peppermint bark.
That’s enough for:
- 6–8 generous gifts
- Or one person with no shame
No judgment here.
Is Peppermint Bark Gluten-Free?
Yes, naturally. This peppermint bark recipe contains no flour and no gluten, as long as your chocolate stays gluten-free.
Always check labels if you gift to someone with allergies.
How This Peppermint Bark Recipe Compares to Store-Bought
Let’s be honest.Store-bought peppermint bark costs more and tastes worse.
Here’s why homemade wins:
- Better chocolate flavor
- Adjustable sweetness
- Fresh peppermint crunch
- No waxy aftertaste
Ever eaten bark that coats your mouth like candle wax? Homemade avoids that entirely.
Troubleshooting Texture Issues
Too Soft?
Your room may be warm.
Fix it by:
- Keeping bark refrigerated
- Using higher cocoa-content chocolate
Too Hard?
You crushed candy canes too finely.Next time, aim for small chunks, not powder.Texture lives in the details.
Why Peppermint Bark Feels So Nostalgic
This dessert carries memories.
I associate peppermint bark with cold kitchens, sticky fingers, and sneaking pieces before dinner. It feels festive without trying too hard.
Ever notice how one bite instantly puts you in a holiday mood? That’s the power of mint and chocolate working together.
FAQs
Can I use candy cane pieces instead of whole canes?
Yes. Pre-crushed pieces save time and sanity.Just avoid the dust at the bottom of the bag.
Can I make this without peppermint extract?
You can, but the flavor tastes flatter.The extract adds depth that candy canes alone can’t deliver.
Does peppermint bark melt at room temperature?
Eventually, yes.Keep it cool, especially if you gift it.Chocolate likes chill environments, not sunny countertops.
Final Thoughts on This Peppermint Bark Recipe
This peppermint bark recipe stays simple for a reason. It works. It tastes right. It doesn’t ask too much of you.
You melt, layer, sprinkle, chill, and suddenly you look like someone who has their life together. Even if you don’t. Especially if you don’t :/
If you make one holiday treat this year, make this one. Break it up. Share it around. Or hide it in the back of the fridge and pretend it’s gone. I won’t tell.
So, are you team dark chocolate or team white chocolate overload? Either way, you’re about to win.