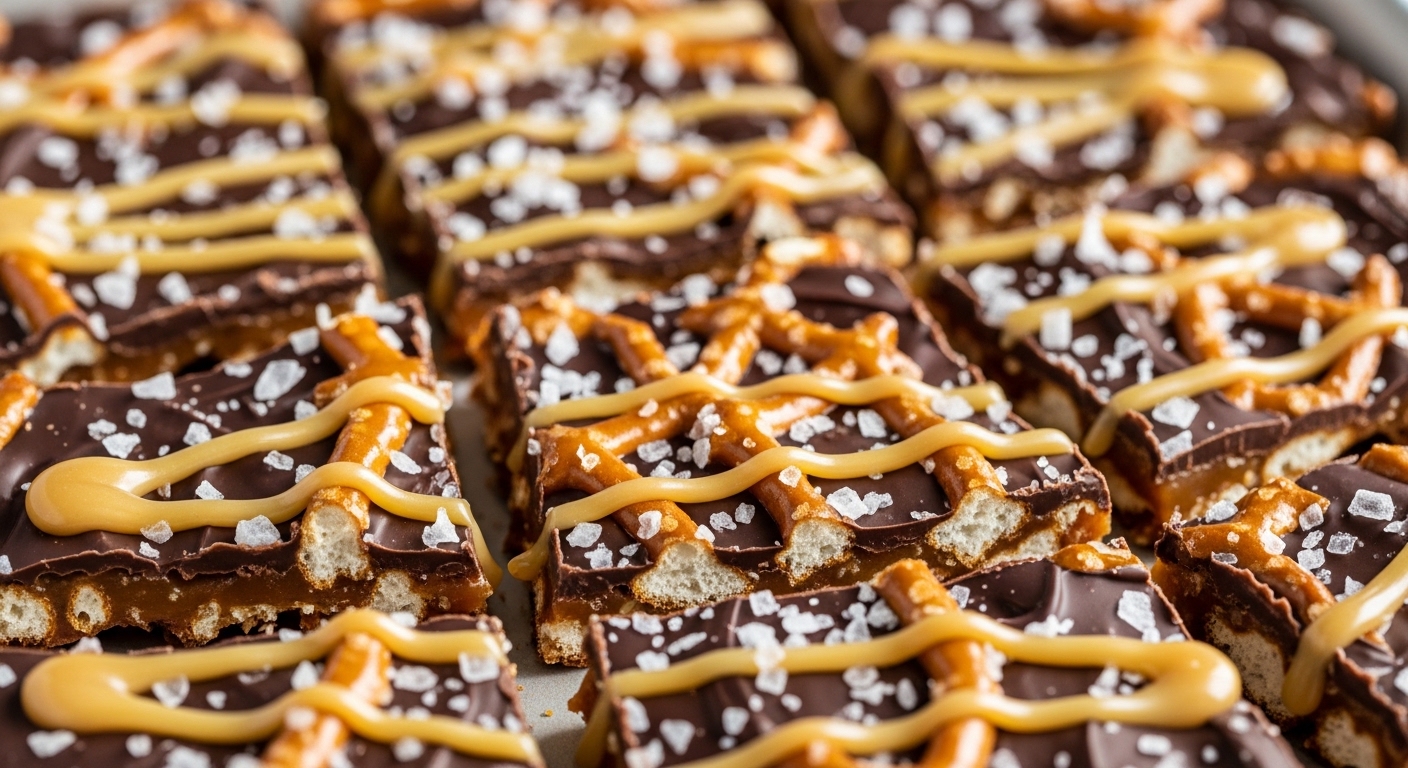
Homemade Salted Caramel Pretzel Bark Recipe Everyone Loves
Let me start by asking have you ever bitten into something that’s sweet, salty, crunchy, and utterly addictive all at once? If not, you’re in for a treat because salted caramel pretzel bark is exactly that. Seriously, one bite and you’ll understand why this snack disappears faster than you can say “dessert time.”
I first discovered this gem during a late-night baking experiment. I had a bag of pretzels, some leftover caramel, and chocolate that was begging to be melted. Long story short, I ended up with a tray of golden-brown bliss, and since then, it’s become my go-to for gifts, parties, or just when I need a pick-me-up.
If you’ve been searching for a fun, easy-to-make snack that feels gourmet but is actually effortless, you’ve hit the jackpot. Let’s break it down, layer by layer, and I’ll spill all my tips for making the perfect bark every single time.
Why Salted Caramel Pretzel Bark Is a Game-Changer
So, why does this snack get so much love? Honestly, it’s the balance of textures and flavors.
- Crunchy pretzels give a satisfying snap.
- Rich chocolate melts in your mouth like a dream.
- Sweet caramel adds a sticky, buttery punch.
- A hint of sea salt ties everything together.
Ever wondered why sweet and salty combos hit differently? There’s some science here: salt amplifies sweetness and creates that addictive flavor harmony. Basically, your taste buds throw a tiny party every time you take a bite.
Plus, it’s super versatile. Want a casual snack? Break it into chunks. Need a fancy dessert for guests? Arrange it on a platter and watch jaws drop.
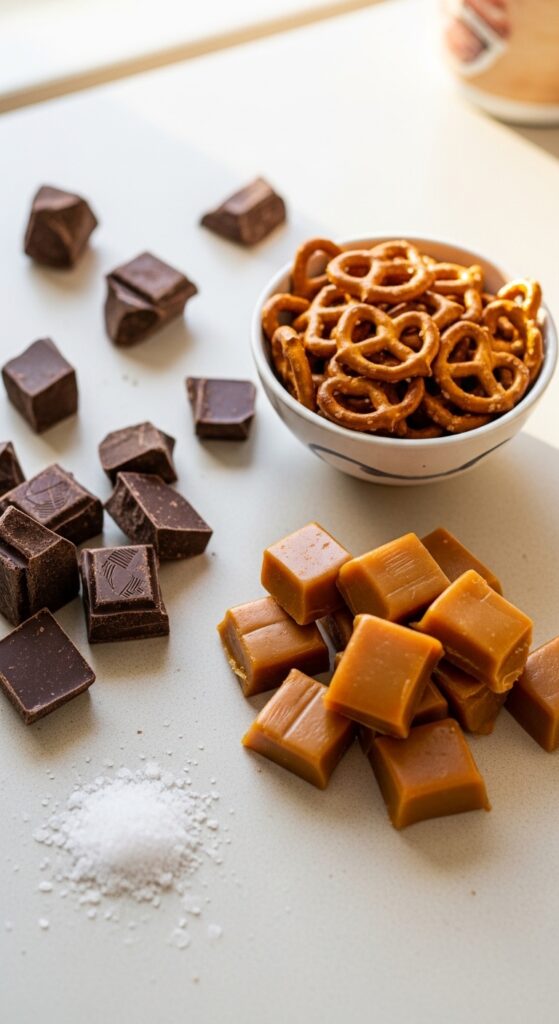
Ingredients You’ll Need
Before we get into the fun stuff, let’s check out what you’ll need to make homemade salted caramel pretzel bark. FYI, this recipe is forgiving you don’t need gourmet ingredients, just good quality basics.
Main Ingredients
- Pretzels: Mini twists or sticks, whatever you have. Crunchy, salty, and ready to hold up under chocolate.
- Chocolate: Semi-sweet works perfectly, but feel free to mix milk or dark chocolate for a layered look.
- Caramel: Soft, buttery caramel, either store-bought or homemade. Pro tip: a little cream makes it silkier.
- Sea Salt: Flaky salt is ideal it gives that pop of flavor without overpowering the sweetness.
Optional Add-Ons
- Chopped nuts (pecans or almonds) for extra crunch
- White chocolate drizzle for visual contrast
- Sprinkles for a festive touch
Step 1: Prepping Your Workspace
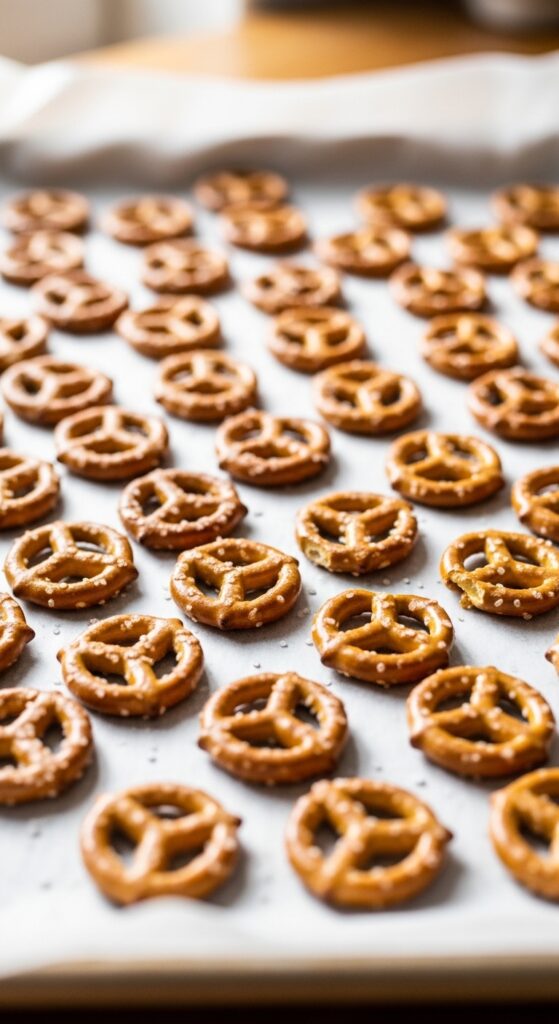
Before melting chocolate and caramel, prep your baking sheet. This is one of those “set yourself up for success” steps that pays off.
- Line a large baking sheet with parchment paper or a silicone mat. This prevents sticking and makes cleanup a breeze.
- Spread your pretzels evenly across the tray no overlapping! This ensures every bite gets chocolate and caramel coverage.
- Optional: lightly toast pretzels in the oven for 2–3 minutes at 350°F (175°C). This gives a deeper flavor.
Ever done all the hard work only to have sticky chocolate glued to the pan? Yeah… learned that one the hard way.
Step 2: Melting the Chocolate
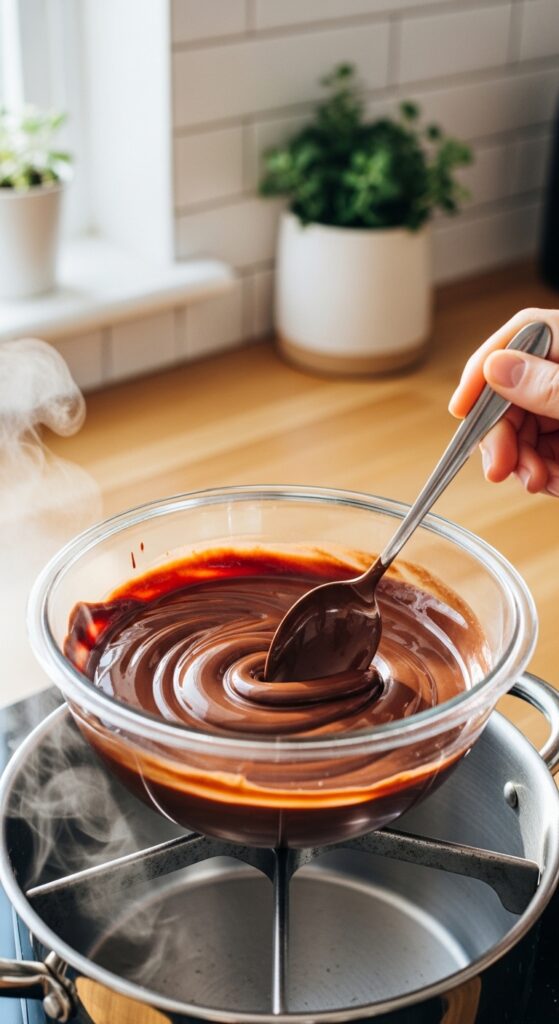
Now comes the fun, gooey part melting chocolate.
Stovetop Method
- Chop your chocolate into even pieces for quick melting.
- Use a double boiler or a heat-safe bowl over simmering water.
- Stir gently until smooth, glossy, and completely melted.
Microwave Method
- Chop chocolate and place in a microwave-safe bowl.
- Microwave in 30-second intervals, stirring in between.
- Stop once chocolate is smooth and silky.
Pro tip: Don’t overheat chocolate, or it can seize. If it thickens, add a teaspoon of butter or cream and stir.
Step 3: Drizzling the Caramel
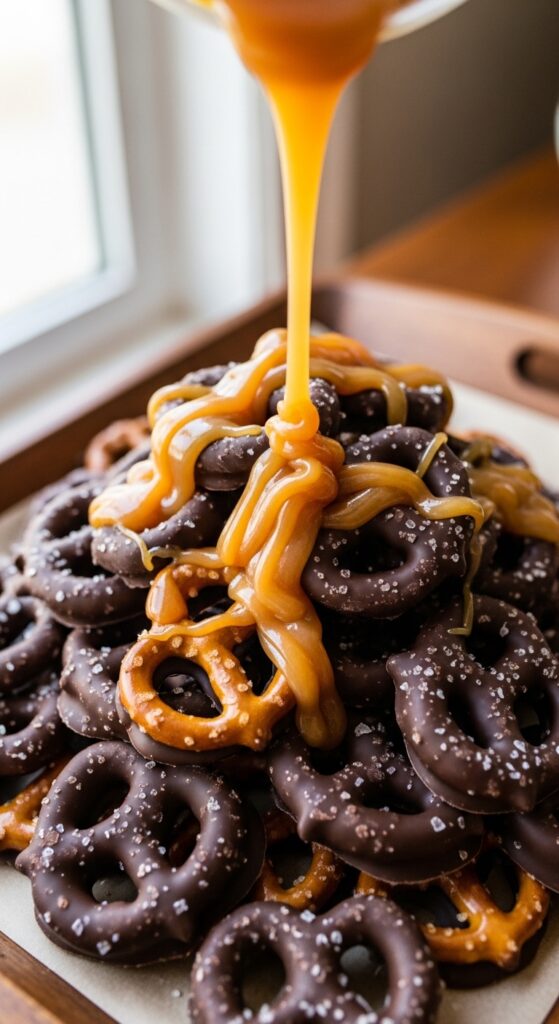
Here’s where your bark starts looking fancy.
- Warm the caramel slightly just enough to make it pourable.
- Using a spoon or piping bag, drizzle over the chocolate-covered pretzels.
- Aim for thin, even streaks so every bite has that sweet, buttery hit.
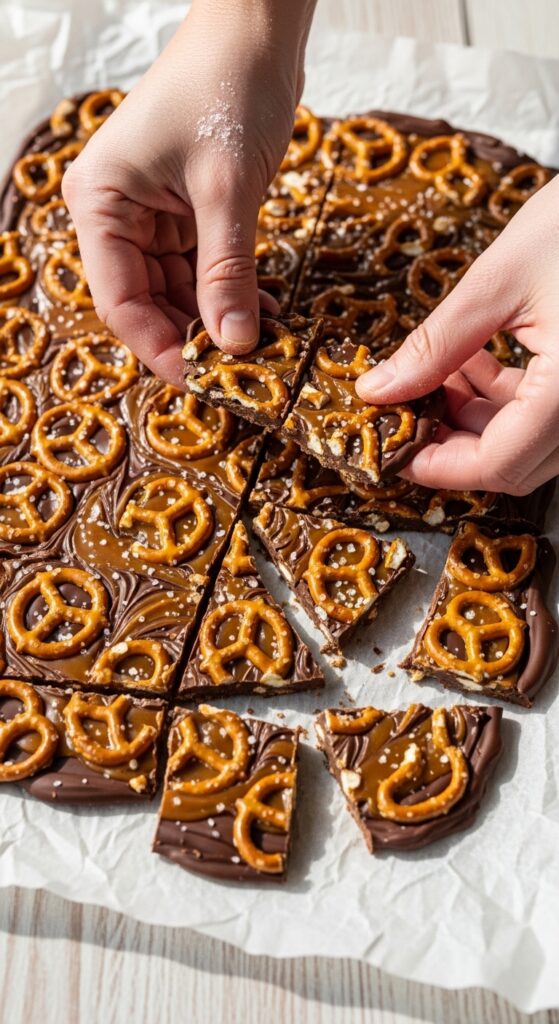
Want a little extra flair? Swirl the chocolate and caramel together with a skewer for a marbled effect. Looks like you spent hours in the kitchen, I promise.
Step 4: Adding the Salt
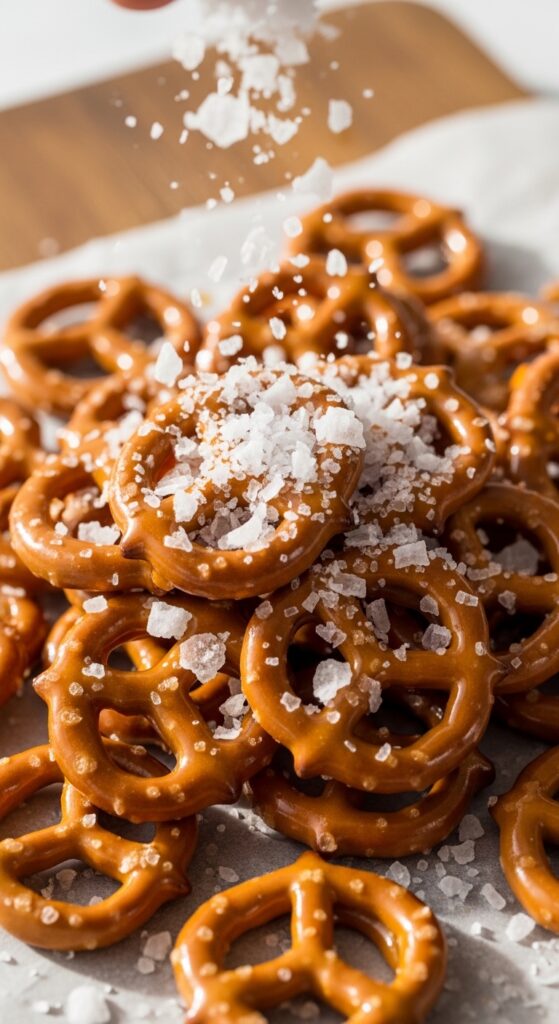
Now for the magic touch: sea salt.
- Sprinkle lightly across the top while caramel is still soft.
- Flaky salt is better than fine you want those little bursts of flavor.
- Remember: a pinch goes a long way; too much can overpower the caramel’s sweetness.
Honestly, this is the step that turns a simple chocolate bark into gourmet-level salted caramel pretzel bark.
Step 5: Letting It Set
Patience is a virtue here.
- Let the bark cool at room temperature for 15–20 minutes.
- For faster results, pop it in the fridge for 10–15 minutes, but avoid freezing unless you’re making it way ahead.
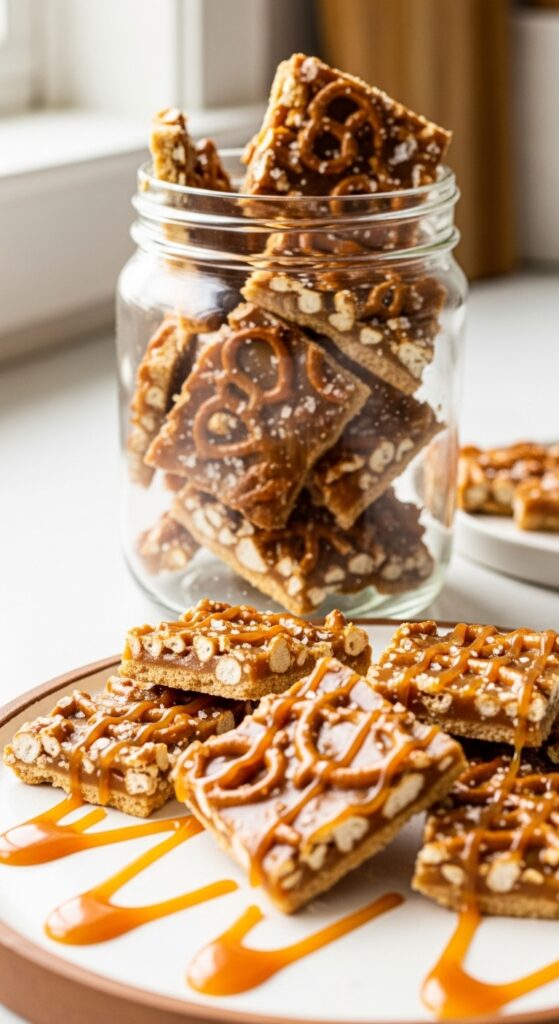
- Once set, break into irregular chunks for a rustic, homemade vibe.
Pro tip: irregular pieces make it more fun to eat and look authentically homemade perfect for gifting or parties.
Step 6: Serving & Storing
This bark is super flexible in how you serve and store it.
Serving Ideas
- Stack chunks in a pretty glass jar for a gift.
- Serve on a dessert platter with chocolate drizzle for parties.
- Crumble over ice cream or yogurt for a sweet-and-salty treat.
Storing Tips
- Store in an airtight container at room temp for up to a week.
- Or refrigerate to keep it firmer, especially in warmer weather.
- Avoid freezing unless you want it super solid; chocolate can sometimes bloom.
Tips for Perfect Salted Caramel Pretzel Bark
Making the perfect bark isn’t rocket science, but a few tricks help.
- Use quality chocolate it makes a noticeable difference.
- Toast the pretzels for extra crunch and depth.
- Drizzle, don’t pour the caramel for even coverage.
- Use flaky sea salt tiny crystals pack a punch.
- Work in layers: chocolate, pretzels, caramel, salt, optional drizzle.
Ever skipped these steps and ended up with a sticky mess? Yup, me too. Stick with these tips and you’ll have a tray of bark that disappears faster than you can make it.
Variations to Try
The beauty of this recipe is how adaptable it is. Here are some ideas:
- Chocolate Lovers’ Bark: Add extra chocolate drizzle or white chocolate swirls.
- Nutty Bark: Sprinkle chopped pecans or almonds on top.
- Holiday Bark: Use festive sprinkles or colored drizzle for Christmas, Halloween, or birthdays.
- Spicy Bark: Add a dash of cayenne or cinnamon for a warm twist.
Seriously, the variations are endless, and each one gives you a fresh way to impress friends and family.
Common Mistakes to Avoid
Even experienced bakers sometimes mess this up. Here’s what NOT to do:
- Overheating chocolate: Leads to grainy or burnt chocolate.
- Skipping parchment paper: Sticky cleanup nightmare.
- Adding salt too late: Salt sticks best while caramel is soft.
- Layering too thick: Bark should be crunchy, not a gooey mess.
Avoid these, and you’ll have gorgeous, crunchy, and perfectly balanced bark every time.
Why This Recipe Works
So, what makes this recipe foolproof?
- Simple ingredients: You don’t need fancy stuff just chocolate, pretzels, caramel, and salt.
- Layering method: Each layer has a purpose, giving crunch, sweetness, and flavor bursts.
- Flexible timing: Can prep ahead, store, and serve whenever you want.
Honestly, this is the type of recipe that impresses without stress and we all need more of that in our lives, right?
Perfect Occasions for Salted Caramel Pretzel Bark
Wondering when to serve this? The answer: always.
- Holiday parties or cookie exchanges
- Casual movie nights at home
- Gifting to coworkers, teachers, or friends
- Dessert tables at weddings, showers, or birthdays
It’s the kind of treat that everyone reaches for first and then comes back for seconds.
Final Thoughts
Making salted caramel pretzel bark is a fun, simple, and rewarding dessert that satisfies that sweet-and-salty craving we all secretly love. It’s crunchy, buttery, sweet, salty, and endlessly versatile. Plus, it looks fancy while still being totally homemade perfect for impressing guests or gifting to friends.
Next time you’re craving a treat that’s easy to make, visually stunning, and utterly addictive, whip up a batch of this bark. Trust me, it disappears fast, so make extra. Your friends, family, and taste buds will thank you.
FYI, this recipe is one of those rare desserts that’s stress-free yet feels gourmet, which is basically my holy grail for home baking.